How
to Create a Survey
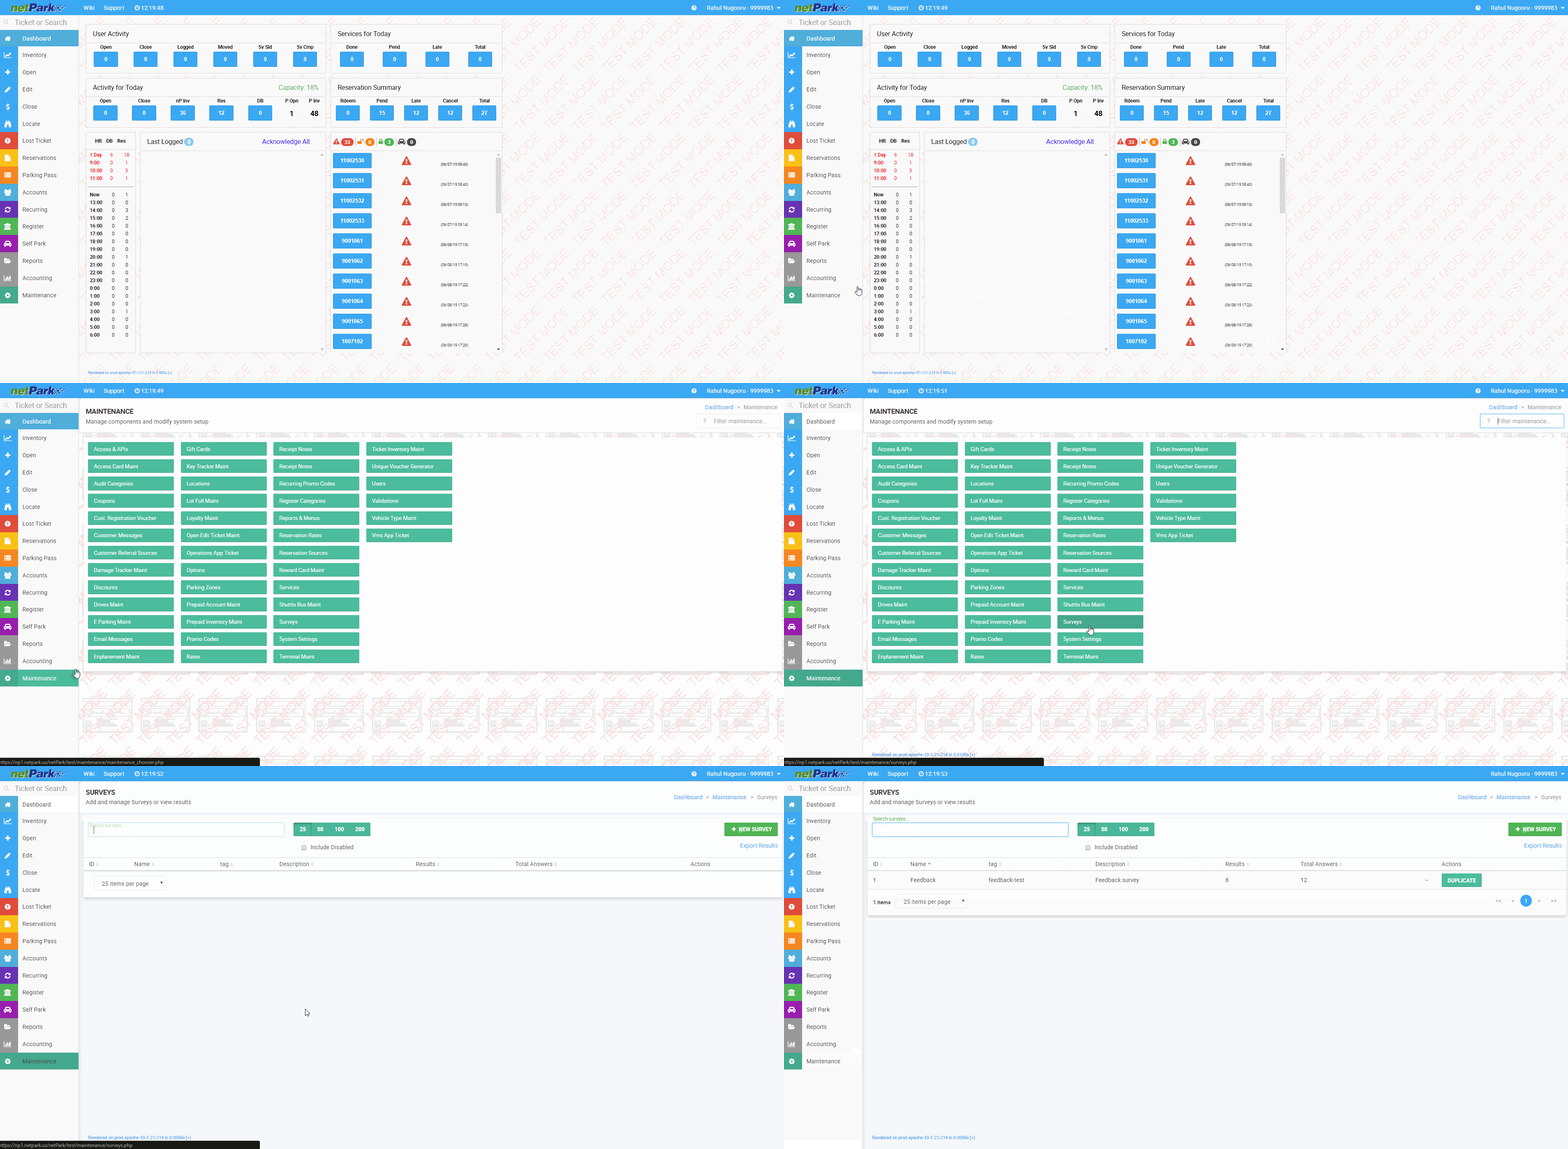
- From the Dashboard, users
will go to Maintenance and click on the Surveys button.
This will take users to the Survey search screen
· Within this screen users will be
able to create, edit, and view results of surveys
· If you do not have the Survey option
contact netPark to have it enabled, there may be a fee involved
- Within the Survey
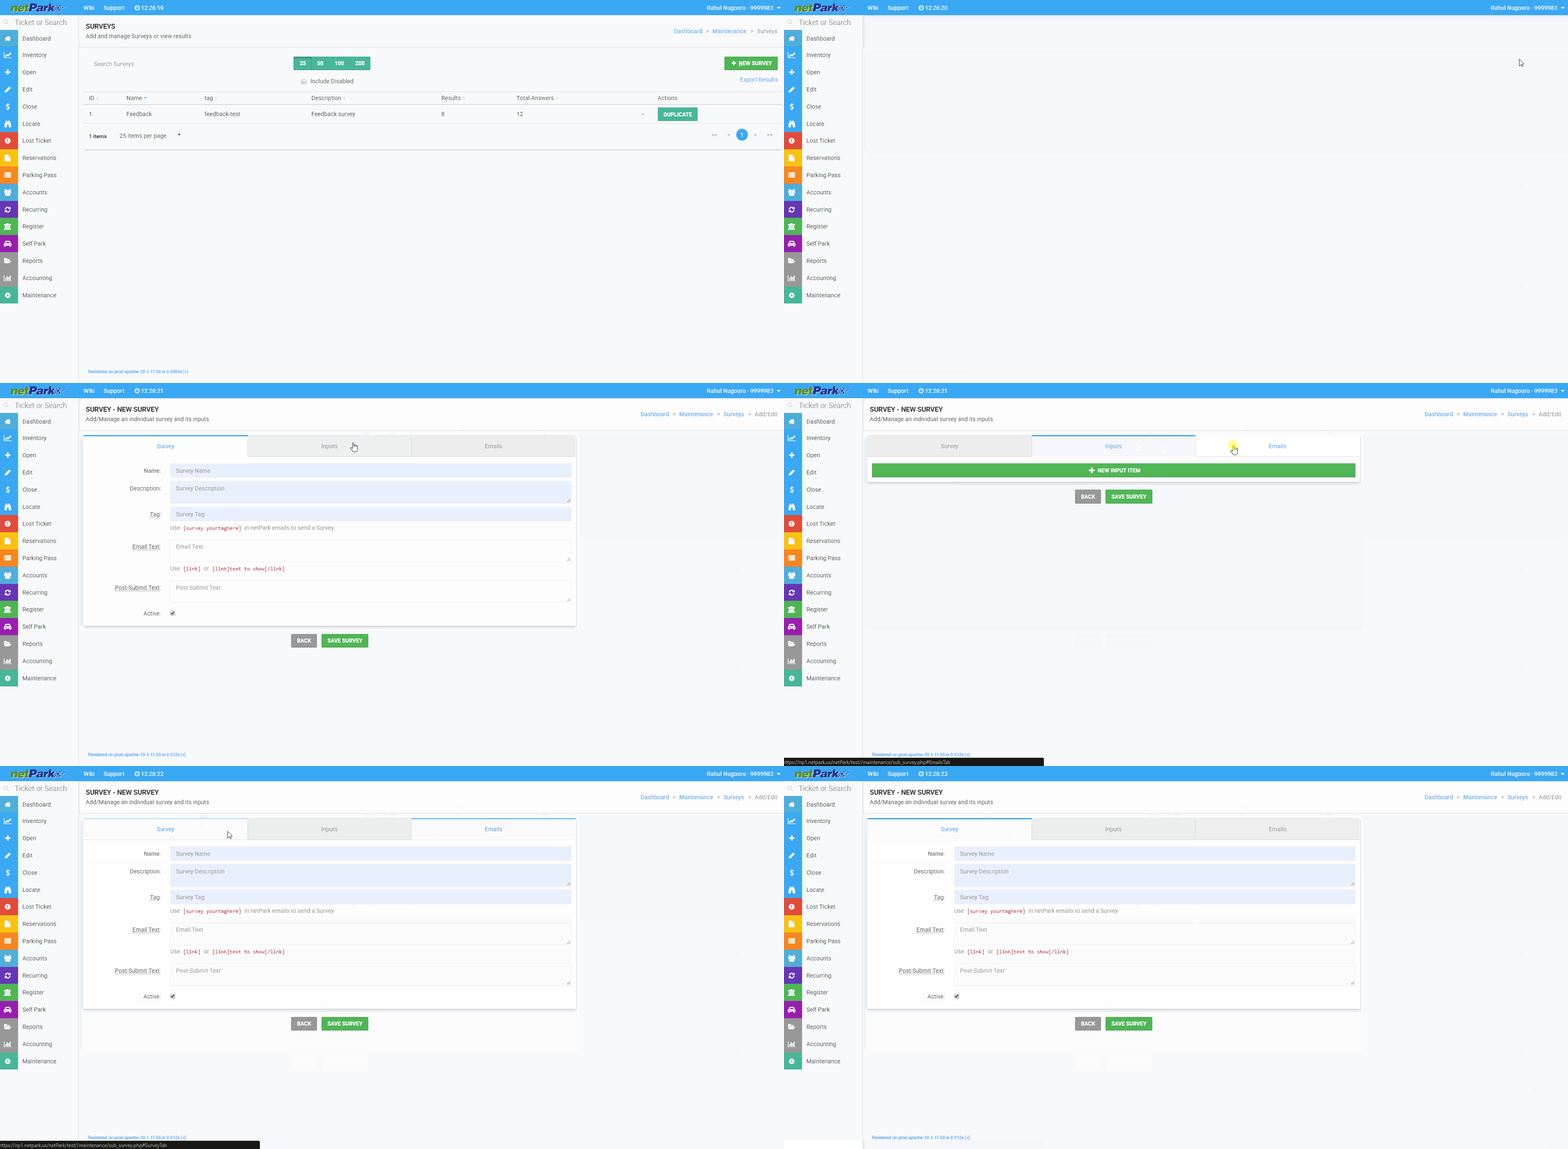
Search screen, users will need to click on the green +
NEW SURVEY button. This will take users to the Survey creation
screen.
- In this screen users will need
to input the Name, Description and Tag.
- The tag is what is going to be
used in the Email Message that the customers will receive the survey
with.
- Users can set this tag
in Email Messages Maintenance. The format must
be [survey tagname]
- Users can change how this tag
is displayed by using the Email Text. If this is left
blank the survey will display: Please Take Our Survey! (following with
the link). If users want to keep the survey tag as the name then users
will just type in [link]. Users can input whatever they
want and must type that information in between a [link] [/link].
- After filling in the Survey
information users will need to go to the Inputs tab to
create the survey questions.
- Users will be given different
options for the type of question and sub types.
- The Tag box will allow users
to use the tag in the email response that goes to the customer after the
survey.
- For more in-depth on the types
of questions go here:
- After creating the question
users will need to click the green Save Input button
- After creating all the
questions wanted, users will need to click on the Emails tab.
- Within this tab, users will
need create an email that will be a response after the customer takes the
survey.
- Users will need to click the
blue +ADD EMAIL if a new template needs to be created or
users can select the default template netPark has provided.
- Note, to send the email to the
users, the tag [email] will need to be put in the TO field.
- For an in depth understanding
of the Email Templates go here:
- After going through all three tabs, users will need to click the green Save Survey button

