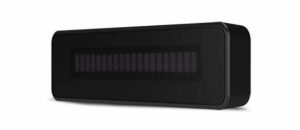
netPark Supports a Customer-Facing fee display. This simple guide walks through how to configure the fee display in Windows so the netPark Desktop Application is able to use it.
Installation
- Download and Install Driver
- Connect Fee Display to computer (Windows should auto-detect and initialize)
- Start the netPark Desktop Application and attempt to close a ticket, the fee display should light up
Troubleshooting

If the Fee Display is connected before the drivers are installed, older drivers for the display may be automatically installed by Windows. When this happens it’ll be necessary to ‘uninstall’ the device to fix it. The instructions walk through that process:
- Open the start menu and type “Device Manager”; Open Device Manager
- Expand “Ports (COM & LPT)”
- Right-click the entry that says to “Please contact your supplier”; select “Uninstall device”; Check the box that asks if you should delete the driver
- Install the driver from Installation above
- Back in “Device Manager”, click “Action” -> “Scan for hardware changes”
- This should install the proper driver. Restart the Desktop Application and test.
Custom Messages
The Desktop Application supports two custom messages:

- Idle – Shown when the fee display is not showing a total
- Thank You – Shown after a customer pays for their parking
To set these, in the Desktop Application:
- Go to the Application Menu (3 bars at the top-right)
- Select “Configuration”
- Select “Devices” on left-hand menu
- Hit the Edit button (“Pencil Icon”) and update the messages
- Hit the Save button (“Disk Icon”) to save
- Changes should take affect immediately – idle message may require an application restart
