The Q-SAQ Validator Kiosk provides a low cost method of access control for facilities that need basic entry & exit control for residents, tenants or any other type of credentialed entry and exit. These devices can also be used for nesting purposes to allow customers to move between different parts of your facility.
Q-SAQ Validator Kiosk Features
The Q-SAQ Validator Kiosk has the following features:
- Front Mounted High density OMNI Directional bar-code scanner
- Capable to read and process any standard Barcode format
- 4×20 character led illuminated LCD display
- Real time clock
- 4 optically isolated inputs
- 5 relay outputs
Setup the device in netPark
The first step in configuring a Q-SAQ device is to get setup all devices in netPark. This allows us to clearly id each device and makes it easier to manage the lot. To begin, navigate to the Self Park screen in netPark and click the “Add New” button. A window will popup with some questions about the device you are configuring. With this being an Q-SAQ device you’ll want to select either “Teratronik Barcode Entry” or “Teratronik Barcode Exit” based on the specific use of the device. Provide a clear description of the device (e.g. Lot A Left Exit).
Note: The Lane Number specified here is what we will use when configuring the Q-SAQ device.
Configuring the Q-SAQ Validator Kiosk
All Q-SAQ device configuration can be accomplished by using the menu button. Pressing the button will activate the firmware menu. Rotating the button will scroll though the menu.
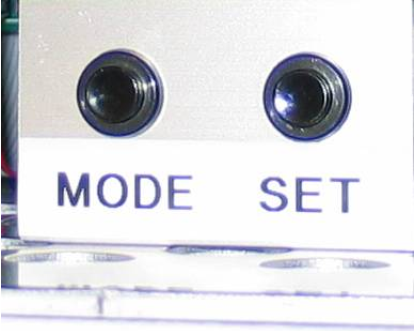
Pressing “MODE” will start the menu. The display on the front panel serves as user interface during the programming mode. The “MODE” button scrolls through the different menu settings and the “SET” button allows you to make changes. The selected menu settings flash when selected.
Menu Structure
Below is a breakdown of all of the various Menus and their proper settings:
- Date & Time – System Date and Time Settings
- Date Format – Date Format
- System ID – Barcode-Parameter for additional peripherals
- Ticket Type – Barcode-Parameter for additional peripherals
- Tariff/rate – Barcode-Parameter for additional peripherals
- Loop Settings – Existing Loop Configuration:
- No Loops = Ticket Issued by Button Only
- 1 Arming Loop = Arming loop and/or Ticket Request
- 2 Loops = Arming loop + Ticket Request + Reset Loop
- Opening Pulse Output – Adjusting of Gate Opening Output
- Backup Timer – Maximum allowed time to pass through two loops configuration before ticket is labeled “Backout”
- Language – Select System/Display Language (English, Spanish, Deutsch)
- Network Setup – Network Settings
- Network Mode – Static IP
- Local IP Address – The Static IP assigned to this device
- Server IP Address – The Static IP assigned to the NIM
- Server Port – 8051
- Router IP Address – The Local Network Gateway
- Net mask – The Local Network Sub-Net Mask (Typically 255.255.255.0)
- Return – Return to operation mode

