Maintaining Stalls inside of netPark is an easy and hassle-free process that allows you to assign stalls to customers to keep them parking at the same spot over and over again. Our Stall feature is built to be integrated with our recurring system so that you can ensure a recurring customer always has a spot. Using our Stall feature will allow you to be able to see when a recurring parker is on the lot when they are off the lot, and when you have available spacing directly from our Stall Maintenance screen or on the Dashboard using our Stall Inventory Widget.
Creating Stall(s)
The first step in learning how to set up stalls is by making sure you are set up to do so. Make sure you have parking zones set up as well as recurring rate groups that are attached to said parking zones. Once you have all that set up and ready, you will be set to start creating stalls.
Below is a guide on how to create a single stall:
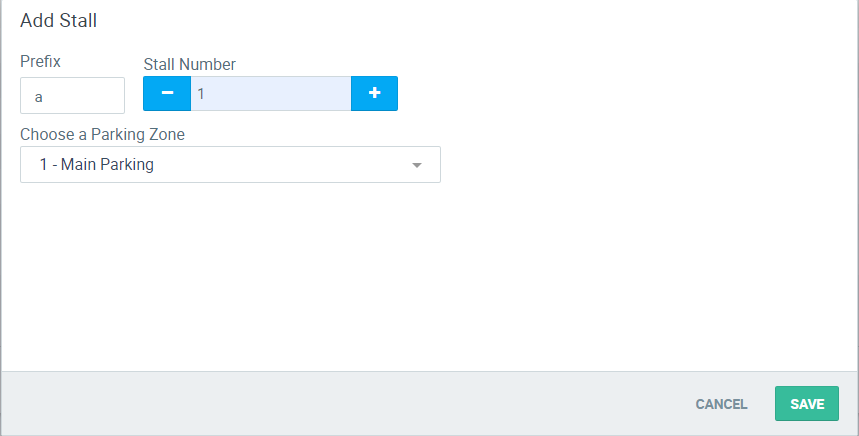
- Via the Stall Maintenance Page, click on New Stall.
- Fill in the Prefix (optional), stall number, and select what parking zone you would like to attach this stall to.
- Special Note: Selecting a parking zone will be extremely important later in the process of attaching stalls to recurring customers because you will only be able to select a stall that has the same parking zone as the recurring rate group.
- Once you have filled out the required information, click on the green Save button in the bottom right of the pop-up.
Sometimes creating 1 stall at a time isn’t going to cut it, so we invented a way to create multiple stalls in no time!
Below is a guide on how to create multiple stalls at a time:
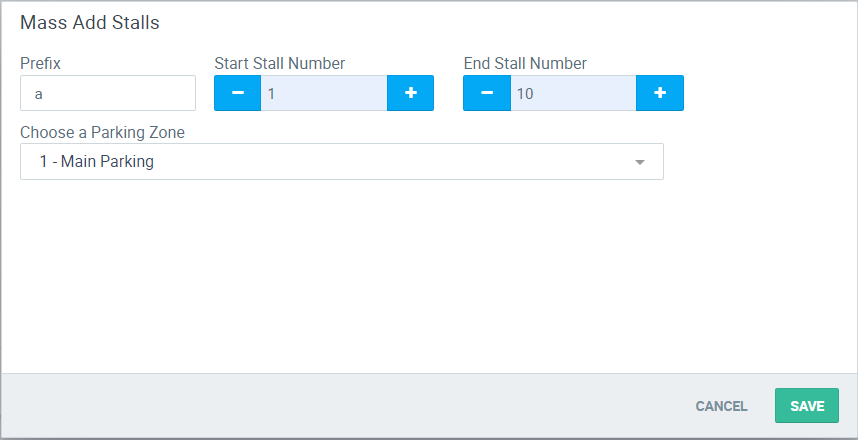
- Via the Stall Maintenance Page, click on Add Mass Stalls.
- Fill in the Prefix (optional), stall start number, stall end number, and select what parking zone you would like to attach this stall too.
- Special Note: If you are adding stalls that overlap with other stalls that have customers/tickets attached to them, you will run into an error that lets you know those specific stalls can’t be edited. A custom error will pop up at the bottom of your screen letting you know what stall that is and what the issue is. Simply go to step 1 of this process and change your stall start number to 1 above the stall it stopped on and continue on.
- Once you have filled out the required information, click on the green Save button in the bottom right of the pop-up.
Editing what is attached Stall
Eventually, you will need to edit what is attached to a stall.
Below is a guide on how to edit what is attached stall:
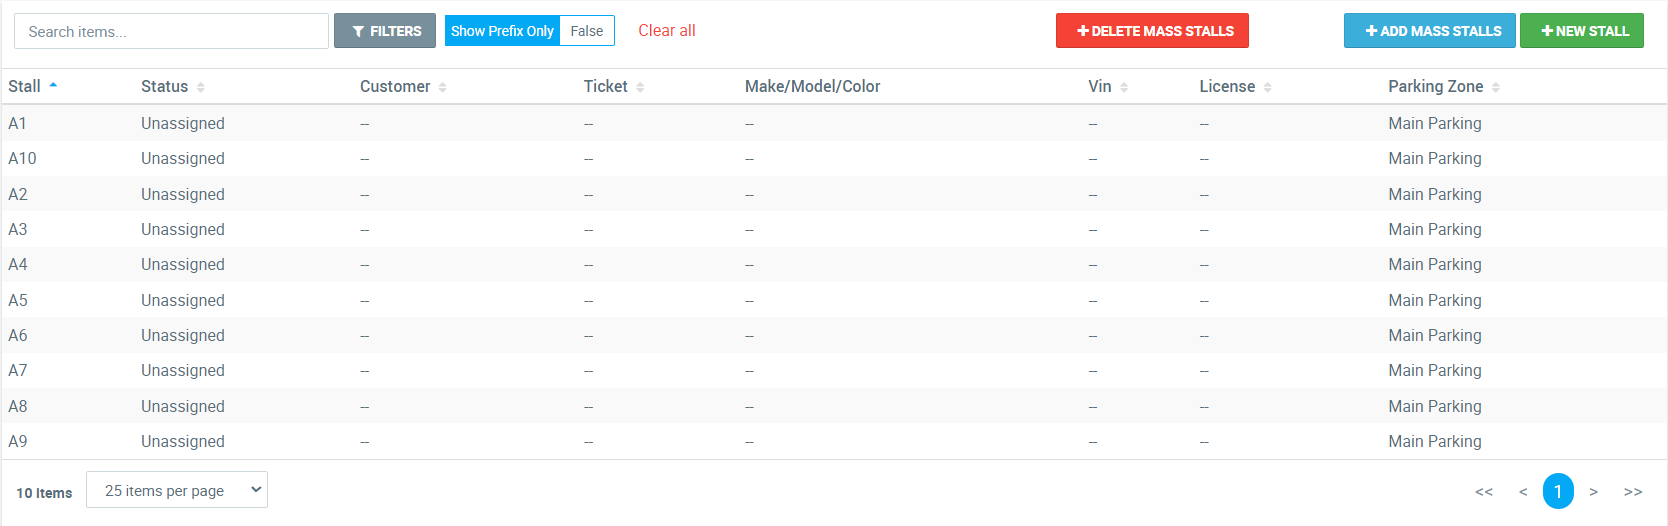
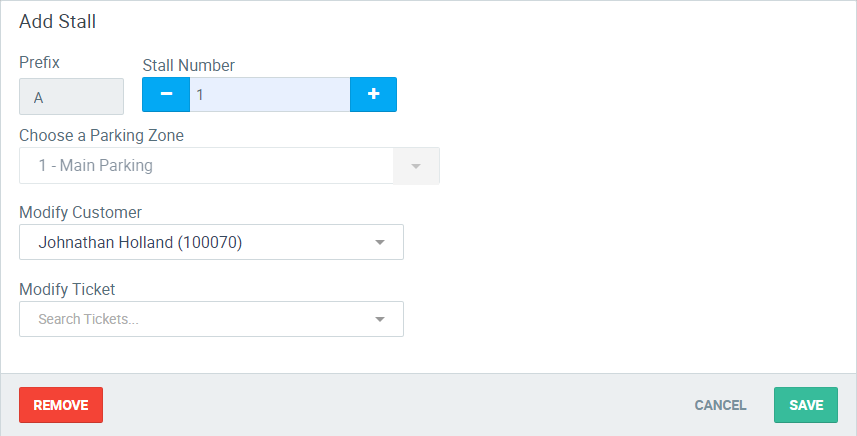
- Via the Stall Maintenance Page, click on any stall that is on the table.
- A new pop-up will appear that has some information filled out. From here you will be able to add/edit a customer to this specific stall, or you can attach a ticket to the stall directly. If there isn’t a ticket attached to the stall, you can use the red Remove button in the bottom left of the pop-up to delete the stall.
- Special Note: Once a ticket has been attached to a stall, it is impossible to change any information attached to the stall except the ticket number itself. Once the ticket is removed you will be able to edit the customer as normal. This is the only manual screen you can remove a ticket from a stall once it is attached.
- Once you have completed your changes, click on the green Save button in the bottom right of the pop-up.
Deleting Stalls
As discussed in the previous section, we went over how to edit and remove a single stall. What if you need to delete a large number of stalls?
Below is a guide on how to delete multiple stalls:
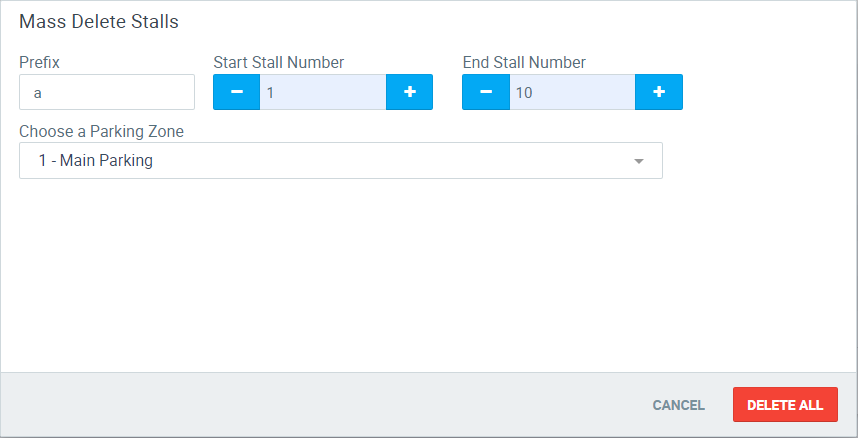
- Via the Stall Maintenance Page, click on Delete Mass Stalls.
- A new pop-up will appear that look very similar to the Add Mass Stalls Pop-up. From here, you can add the prefix, start of the stall numbers, end of the stall numbers, and the parking zones associated with all the stalls you want deleted.
- Special Note: This will only work on stalls that do not have a customer or tickets attached to them. During the delete process we remove stalls one by one, so if it runs into a stall that can’t be deleted, it will stop and give you an error letting you know all stalls before the stall number it stopped on were deleted.
- Once on you have determined what you would like to delete, click on the red Delete All button in the bottom right of the pop-up.
Adding A Customer To A Stall (Via Waiting List)
Now that you’ve created stall, the next step is to add customers to those stalls. You can always do this from the stall maintenance screen, but there are a few of other places you can accomplish this as well. *Please note this guide will work the same way if you are manually adding recurring to a customer account*
Below is a guide on how to add customers to a stall:
- Via the Recurring Page, click on the tab Waiting List.
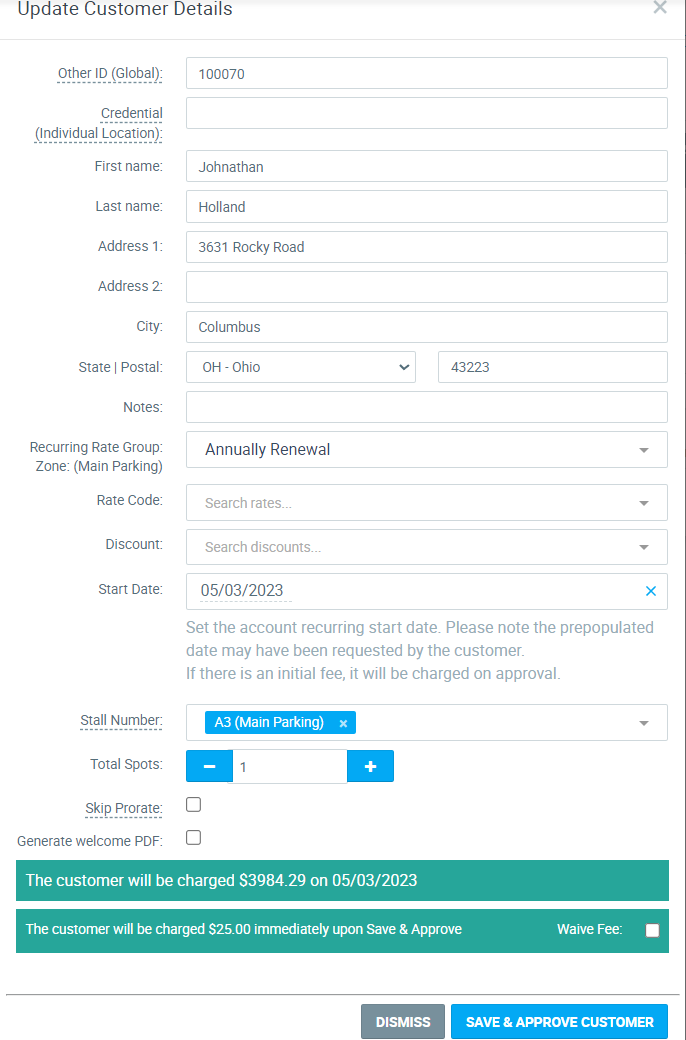
- Once you are on the Waiting list, click on a green Approve button for any customer you wish to approve. If you have stalls active at your location, you will find a new option called Stall Number. This stall number will automatically choose the first empty stall. This can be changed or removed at any point during this process. There is no limit to how many stalls you can add to a single customer.
- Special Note: The stall numbers that show up in the drop down will directly correlate to the recurring rate group’s parking zone.
- Once you have completed your changes, click on the blue Save & Approve Customer button in the bottom right of the pop-up.
Adding A Customer To A Stall (Via Customer Maintenance)
Sometimes you will need to add more stalls to a customer (or even attach stalls without going through recurring).
Below is a guide on how to add a customer to a stall via the customer maintenance page:
- Via the Accounts Page, click on a customer you wish to add a stall to.
- Once you are on the Customer’s Maintenance page, navigate to the Vehicles tab.
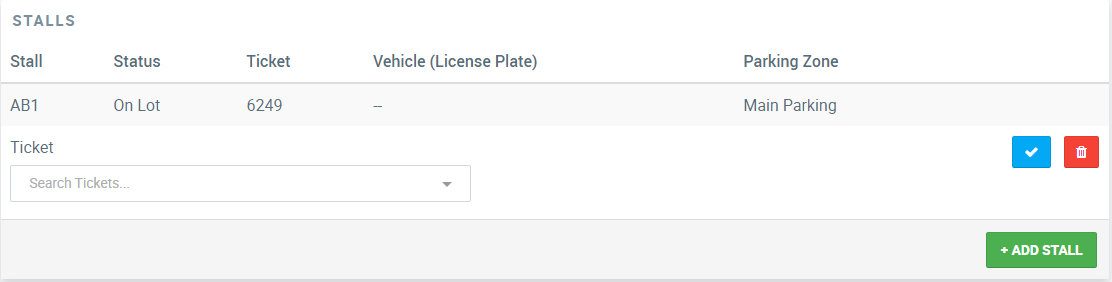
- You will notice a new section called Stalls under the vehicles section. Click the green Add Stall button, and choose what stall you wish to add to the customer.
- Once you have chosen a stall, click on the blue checkmark button to the right of the stall selector.
- Special Note: You will not be able to delete a stall if a ticket is assigned to the stall. You can add a ticket to a stall from this screen, and until it is fully saved on the customer profile, you will have the ability to change or delete the ticket.

Adding A Ticket To A Stall Manually
When adding a ticket to a stall, there are multiple ways this can be achieved.
Below is a guide on all the ways you can add a ticket to a stall manually:
- Via the Stall Maintenance Page, click on any stall you wish to add a ticket to. Once the pop-up shows up, select any open ticket you would like to attach. Once you are done, click the green save button.
- Via the Accounts Page, click on a customer you wish to edit and navigate to the Vehicles tab. From here go to the stall you wish to place a ticket on and click the blue pencil icon. Once you are done, click the blue checkbox and save the customer.
How Does The Automated Ticket Attach System Work?
Once a stall is attached to a customer’s account, netPark will handle the ticket attachment process automatically. It does this in a couple of different ways. Please note: you can always manually add a ticket to a stall if you would like.
Below is a guide on how we handle attaching tickets to stalls automatically:
- If a stall is attached to a vehicle and has a license plate, we will match the license plate of the opened ticket with the license plate of the vehicle attached to the stall and attach the ticket to the stall.
- If a stall is attached to a vehicle and does NOT have a license plate, we will match all other parts of the vehicle that is attached to the stall with the opened ticket vehicle and attach the ticket to the stall that way.
- If a stall is attached to a customer and there are NOT any vehicles attached to it, AND the vehicle on the open ticket screen does NOT have a stall attached to it, netPark will automatically match the first empty stall to the vehicle. On any screen you view the stall on, you will notice that the only thing attached to that stall is the ticket. The vehicle will remain closed.
- Special Note: if you are looking to use 1 stall for multiple vehicles, this is the route we recommend.