Marketing & Mass Communications
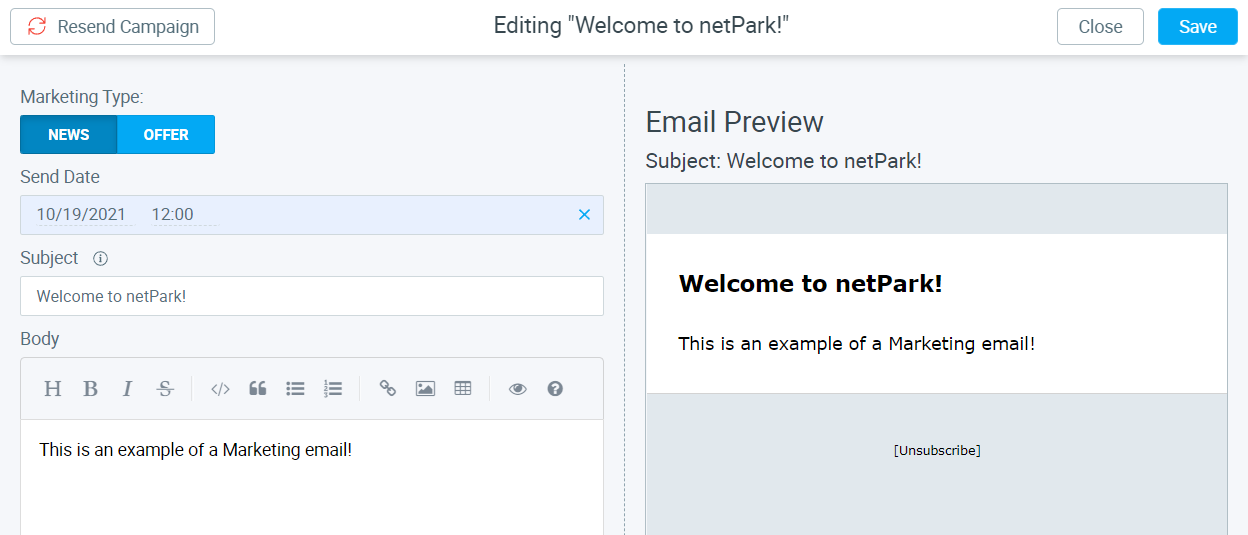
Learn about how to send Mass Marketing & Communications emails.
If you need help, we’re only a call or email away!

Learn about how to send Mass Marketing & Communications emails.
Learn about how to convert an existing customer account to a group account that can pay for multiple sub-accounts.
This article gives a brief overview of the Prepaid screens and how to setup prepaid accounts & cards. Prepaid Cards are pre-purchased blocks of days for future use on tickets. Prepaid Account Screen How to use the Prepaid Account Screen: Click Register>Gift Cards and Prepaid Accounts How to Load a Prepaid Account: When clicking on the load action, you will be taken to a new screen that will allow inventory to be added to an account. In order to create new inventory for a prepaid account, users will need to go to Maintenance, then Prepaid Inventory Maintenance. Users will be able to enable and disable inventory in this section. Creating a New Prepaid Account To create a new account, click Register>Gift Cards and Prepaid Accounts>Add Account Blue fields are the only required fields that must be filled in. It is suggested to fill out as much information as you can. You can click Dismiss to delete

This article provides a brief write-up of the different capabilities a Company Administrator has via the website.
What are a Parking Zones – Parking Zones are a easy way for you to separate customers and areas of parking. Netpark has made the process simple to make sure you have consistency within your parking lot. Creating a Parking Zone From the Dashboard, click Maintenance and then Parking Zones. In this screen, click the green button, +NEW PARKING ZONE A pop-up will appear. In this pop-up will be where information for the Parking Zone is inputed. There will be three tabs of information users will be able to fill out. Using Parking Zones in netPark In this section we are going to go over the different uses for Parking Zones. Using Parking Zones with Self-Park devices. Parking Zones can be used to lock down Self-Park Devices. This means that only vehicles can only come in if they have a ticket, card or reservation associated to
Setting up Parking Zones for Customer Accounts Parking Zones are a great way to differentiate your customer accounts and make sure they enter their correct areas of parking. To set up the Parking Zone, go into the Accounts section of netPark and select the customer that you want to add a Parking Zone to. Then select the Rates & Discounts tab. Scroll down to the bottom of the screen and click on + Add Parking Zone. Make sure the Parking Zone is set up in advance. To learn how to create a parking zone, click here. Select the parking zone and then any other values that are necessary. When completed, click the Blue Check Box and save the customer. How Parking Zones work with Customer Accounts If a location has self-park devices these parking zones can lock down the self-park devices and only allow customers with
This brief article discusses Group/Company administrator accounts, how to configure them, and how they are used within the system.
This article reviews the process for customers resetting their passwords and the common issues that they can experience when trying to do so and how to resolve them.

Learn about creating and managing invoices in the netPark system. This guide explains invoices and how they work within the recurring system.
Phone Hours
(833) 638-7275
Monday – Friday: 10AM to 6PM EST
Emergency Support – 24/7 for business critical functions
Contact Us
Please use this form to contact us with any non-emergency comments, problems or inquiries. Be sure to provide details. If this is an emergency or requires immediate assistance, please call netPark Emergency Support.