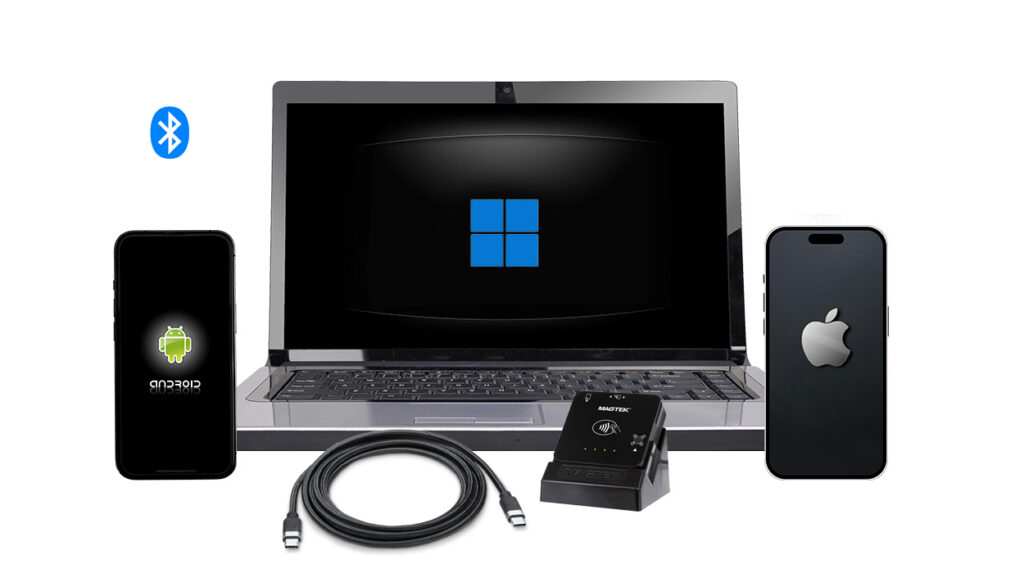
DynaFlex II Go is a secure card reader authenticator in a small form factor that is ready to accept tap, swipe, and dip transactions in a wide variety of payment and access control environments. The device is integrated for use within the netPark MVS App.
Device Overview
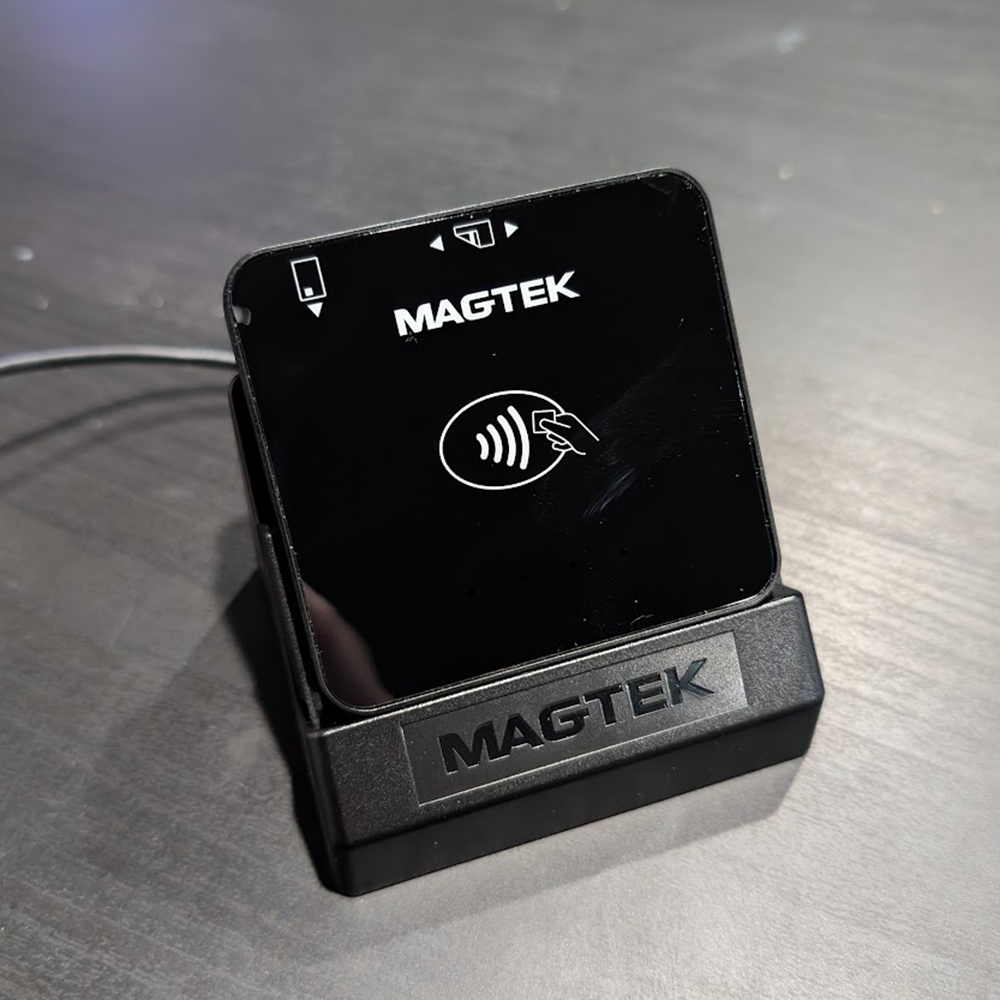
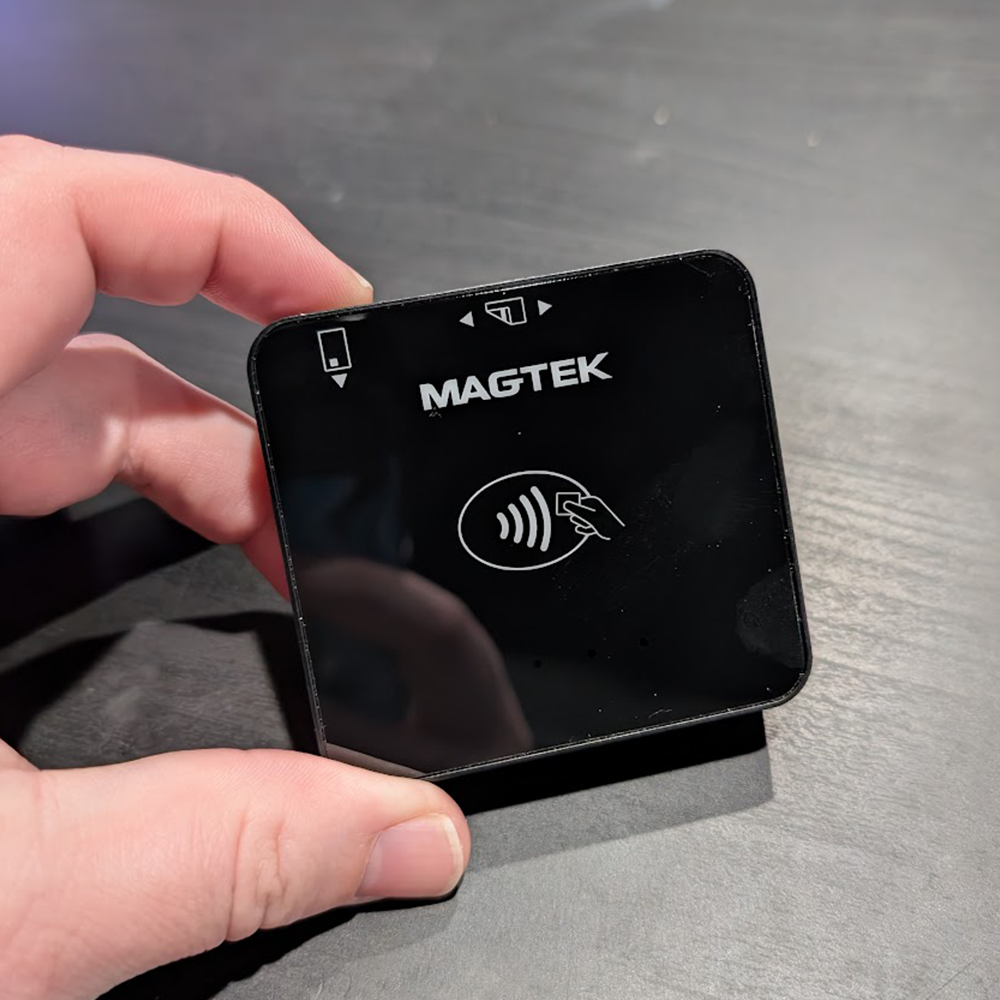
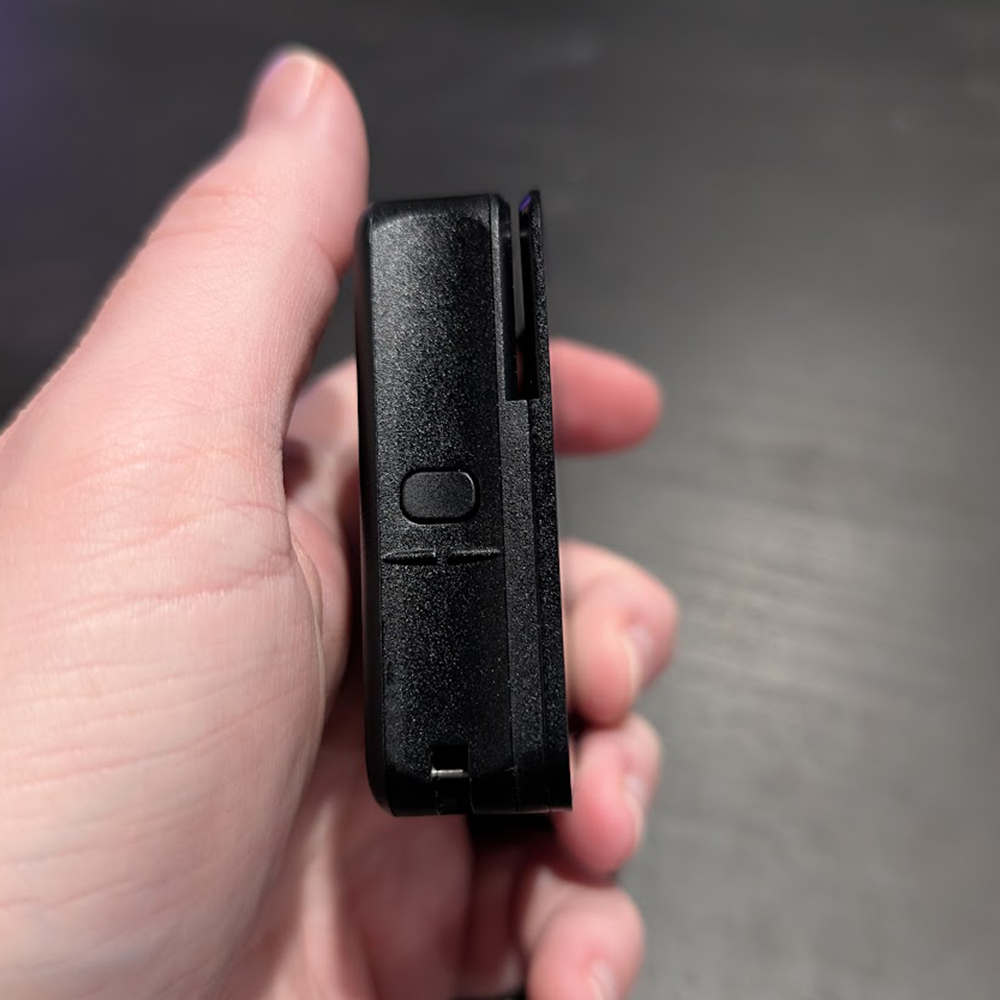
The DynaFlex II Go is extremely simple, including only a single button on the left hand side of the device which is used to power the device on and off, as well as putting it into Bluetooth Pairing mode. The DynaFlex II Go features a magnetic track swipe reader and EMV slot on the top of the device and supports NFC payments via contactless credit cards, Apple Pay and Google Pay via holding the card or device up to the front of the DynaFlex II Go unit.
The DynaFlex II Go features 4 LED lights on the front of the device that show the units activity, as well as displays the battery charge.
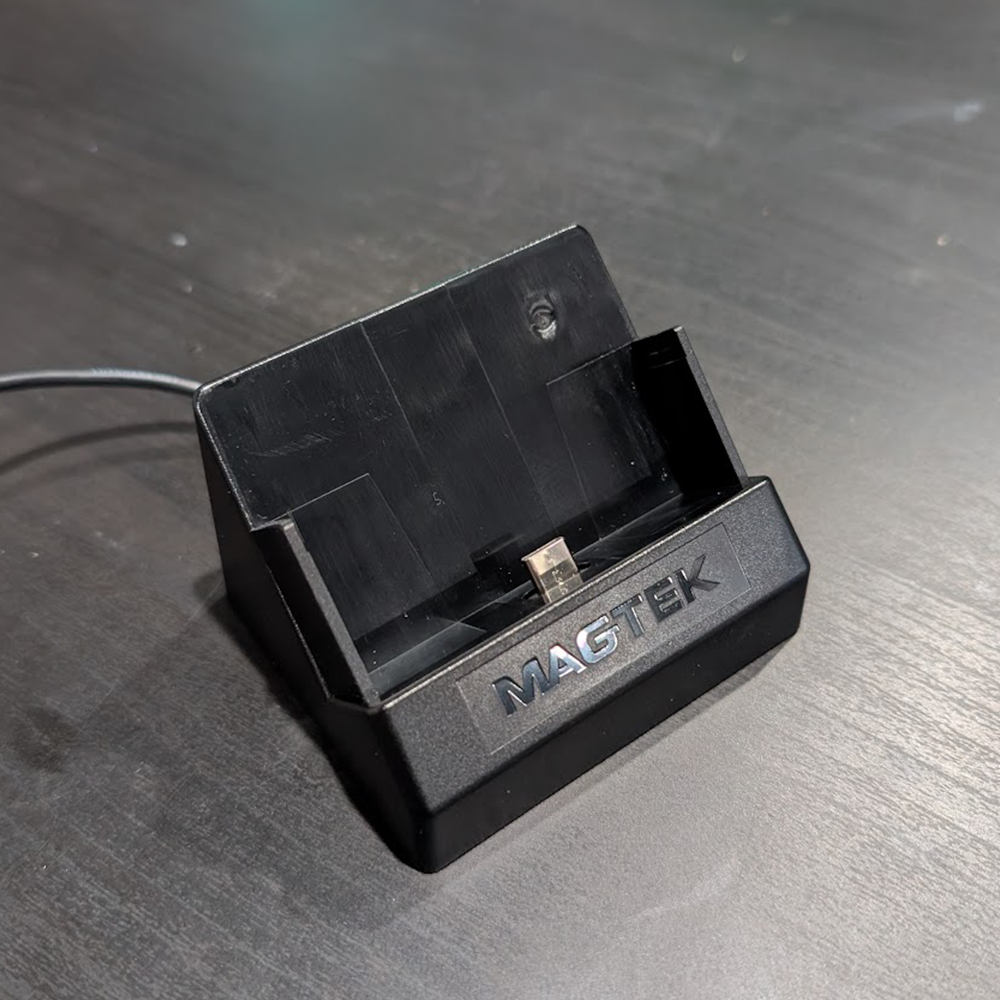
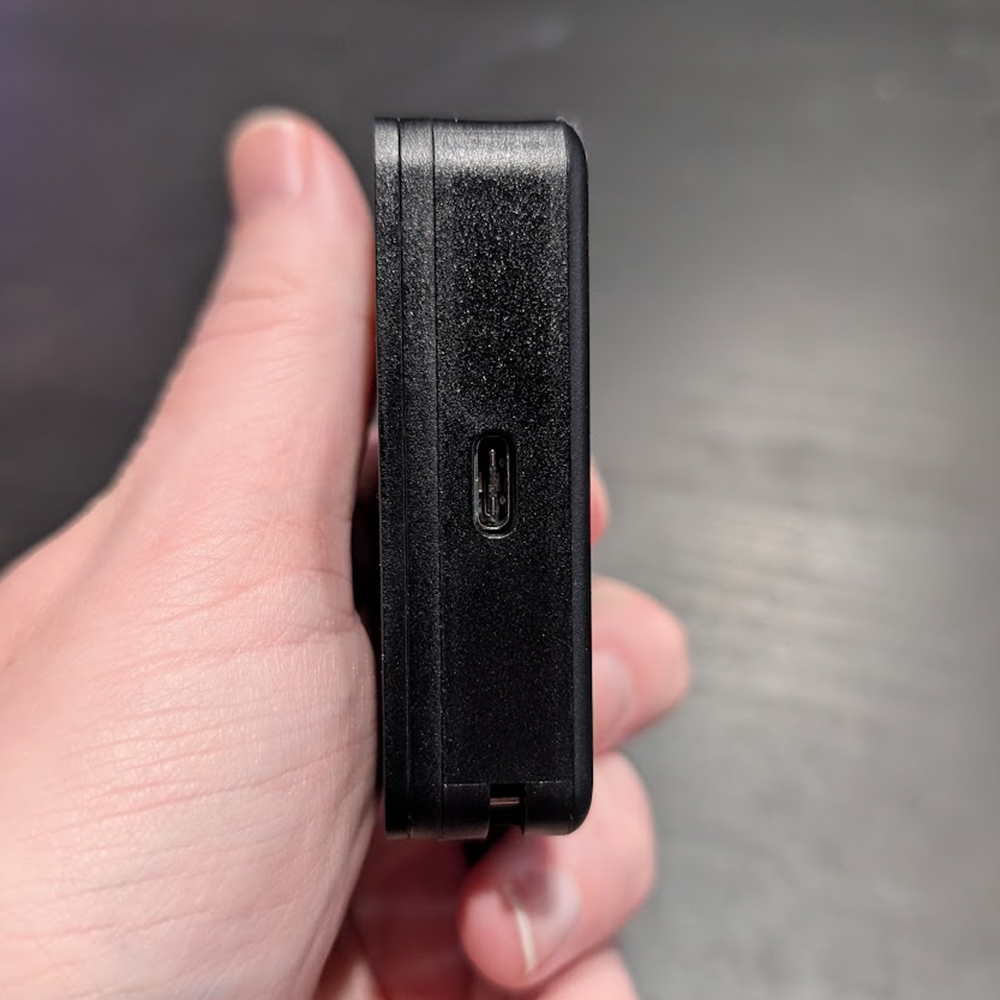
Additionally, the DynaFlex II Go comes with a charging stand that charges the device via the connected USB Type-A cable. The DynaFlex II Go also comes with a short USB Type-A to USB-C cable for charging the unit without the use of the stand.
Additional PDF documents for the DynaFlex II Go device can be found at the bottom of this article.

Connecting the DynaFlex II Go to an iDevice
Connecting the DynaFlex II Go to your iOS device is extremely simple and simply requires the use of the MTUSDK Omni App or directly via the netPark MVS App.
MTUSDK Omni App Link: MTUSDK Omni App
netPark MVS App Link: netPark MVS App
Once you have the app installed, please follow along with written directions below to connect your DynaFlex II Go device.
Connecting via the MTUSDK Omni App:
- If your DynaFlex II Go device isn’t turned on, power it on now. Next, hold the button on the left side of your DynaFlex II Go device until you here 4 beeps and then release to put the device into pairing mode. LED 1 (Left side) will remain solid green and LED 4 (Right Side) will begin blinking when the device is in pairing mode.
- Open the MTUSDK Omni App and tap the blue Select Device button at the top of the screen of the screen.
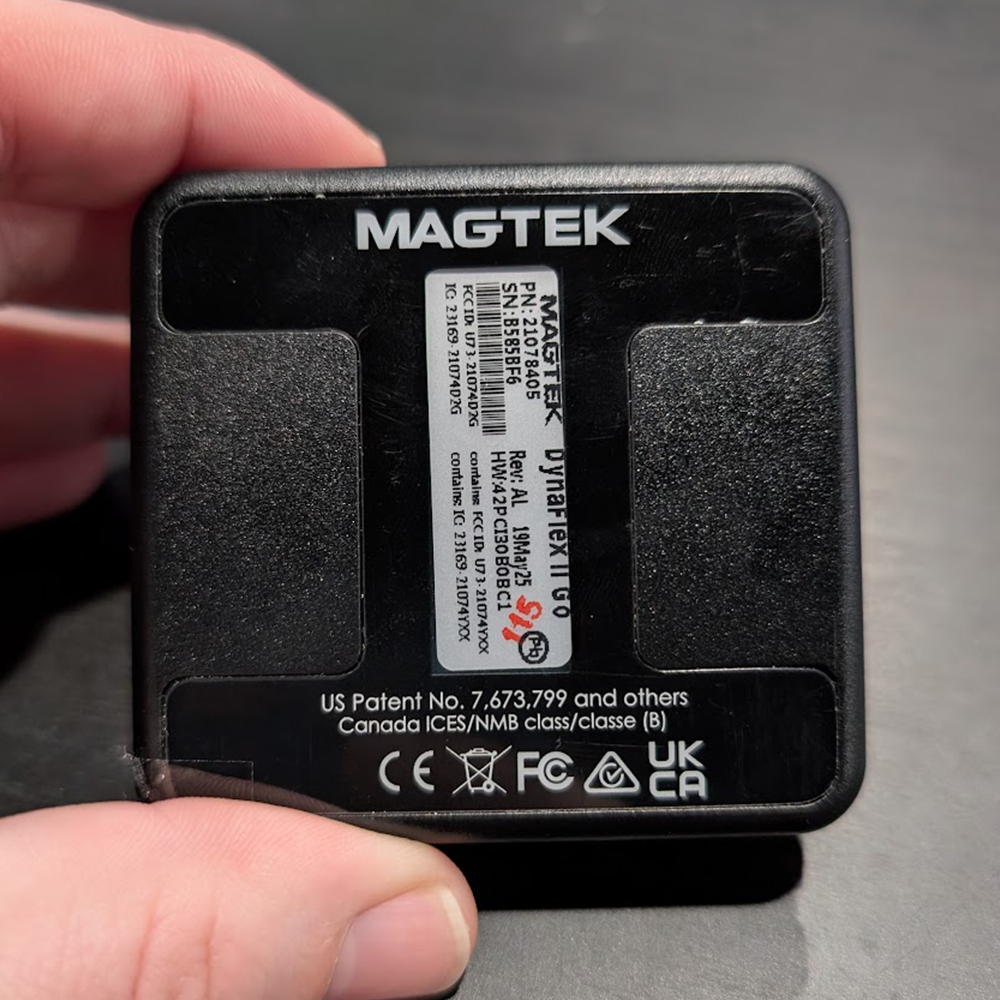
- On the next screen, make sure Bluetooth LE is selected under the Connection Type setting. You should see a device code appear on the screen. Typically this code should say “DF II GO-XXXXXXX” with the X’s corresponding to the Serial Number on the back of the DynaFlex II Go device you are attempting to connect to. Once you have confirmed it’s the right device, tap the device.
- Next you’ll see a screen appear titled “Bluetooth Pairing Request“. You’ll want to enter 6 zeros (000000) as the pairing code and then tap Pair.
- You will see a series of information lines appear at the bottom screen letting you know the device is pairing. You’ll know the device is connected, as you’ll see the DF II GO-XXXXXX appear at the top where the Select Device button was and next to it will be an icon lit up blue with a red X next to a plug. To disconnect the device, tap this icon and the icon will change to a plug sign next to a plug.
- Special Note: It is extremely important that you disconnect your DynaFlex II Go device from the MTUSDK Omni App, as netPark CANNOT communicate with the device when it is still connected to the MTUSDK Omni App and it will not function properly.
- To verify that the device has paired properly, you can go to the Settings > Bluetooth and you should see the DF II GO-XXXXXXX code listed under My Devices.
Connecting via the netPark MVS App:
- If your DynaFlex II Go device isn’t turned on, power it on now. Next, hold the button on the left side of your DynaFlex II Go device until you here 4 beeps and then release to put the device into pairing mode. LED 1 (Left side) will remain solid green and LED 4 (Right Side) will begin blinking when the device is in pairing mode.
- Open the netPark MVS App and login to your location. Once logged in, click on Admin in the bottom right and then Payment Terminal.
- On the next screen, make sure Dynaflex Go is selected in the Device Type setting. Tap the blue Select Device option at the top of the screen. You should see a device code appear on the screen. Typically this code should say “DF II GO-XXXXXXX” with the X’s corresponding to the Serial Number on the back of the DynaFlex II Go device you are attempting to connect to. Once you have confirmed it’s the right device, tap the device.
- Next you’ll see a screen appear titled “Bluetooth Pairing Request“. You’ll want to enter 6 zeros (000000) as the pairing code and then tap Pair.
- Once the device is connected, you’ll see a green toast notification appear at the bottom of the screen stating Connected to DynaFlex II Go. Once the toast appears, the DynaFlex II Go should be paired to the phone.
- To verify that the device has paired properly, you can go to the Settings > Bluetooth and you should see the DF II GO-XXXXXXX code listed under My Devices.
DynaFlex II Go - Button Function Explanation
Below is a breakdown of the different button functions on the DynaFlex II Go device. All of these commands are started by holding the button of the left side of the device and releasing once the counted beeps are heard:
- 2 Beeps – Power Off: Hold for two beeps to power the device off. The device will reboot if it is connected to USB when powered off
- 4 Beeps – BLE Pairing (Pairing Mode): Puts the DynaFlex II Go device into pairing mode
- 6 Beeps – Battery Level: Light the LEDs to indicate the current state of charge of the battery. The LEDs will light for 3 seconds then return to their original state
- Battery Level 100% – 90% – 4 LEDs (First LED color: Green). Transactions Allowed: Yes
- Battery Level 89% – 70% – 3 LEDs (First LED color: Green). Transactions Allowed: Yes
- Battery Level 69% – 50% – 2 LEDs (First LED color: Green). Transactions Allowed: Yes
- Battery Level 49% – 20% – 1 LED (First LED color: Amber*). Transactions Allowed: Yes
- Battery Level 19% to 6% – 1 LED (First LED color: Red*). Transactions Allowed: Yes
- Battery Level 5% to 0% – 1 LED (First LED color: Red*). Transactions Allowed: No
Additional Downloads & Support
This section contains additional documents and downloads that may be beneficial to the tDynamo device.