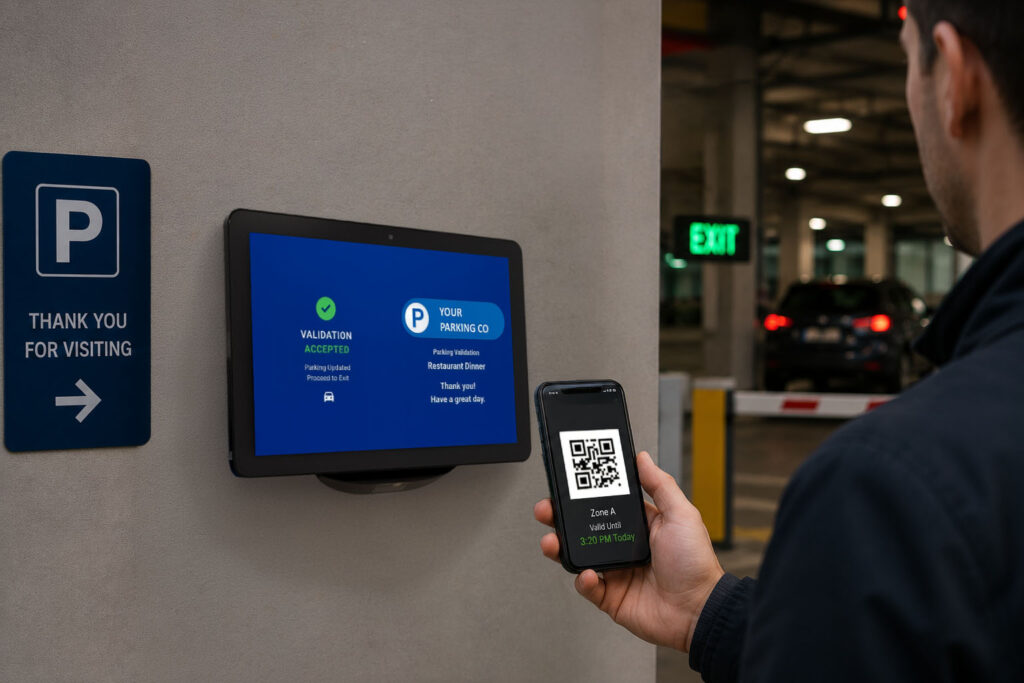
The netPark Validation Scanner is a customer facing scanning application that allows customers to self-validate their parking via an Android scanner terminal. The customers can scan their tickets directly, as well as email and/or text themselves validations if configured to allow it.
Installing the Validation Scanner App
Installation of the Validation App is extremely simple and is done during the initial setup of the Android Scanner device.
You will be provided with a Provisioning Setup Document for your scanners prior to onboarding and that document will contain 3 different QR Codes:
- Provisioning QR Code
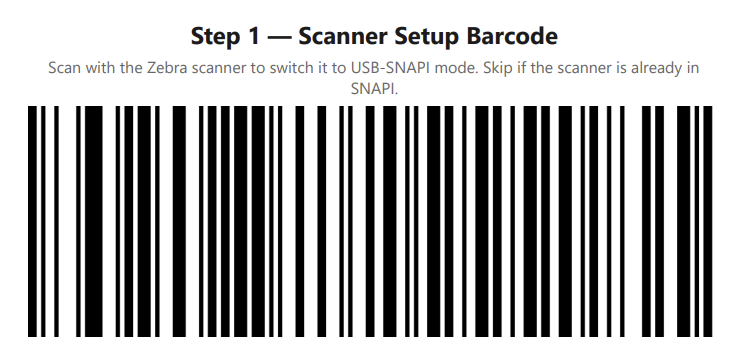
- Scanner SNAPI Setup Barcode
- Validator Configuration QR Code
Each of these codes will be used to configure the scanner during the setup process and will be noted in the steps below.
Step 1: Installing the Validation App & Configuring Kiosk Mode
Below are the steps for installing the Validator App and configuring the Kiosk Mode setup.
Note: It is extremely important that you do not configure the scanner ahead of time, as this process must be done during the initial configuration of the device, prior to ever hitting the Android Interface proper. Failure to do so will require a full Factory Reset of the device to configure.
- Power on the device. Boot up the device until it displays the very first initial setup screen (typically the “Welcome” or “Language
Selection” screen). - Trigger the hidden scanner. Tap anywhere on the blank, empty background space of this welcome screen 6 times rapidly.
- Connect to Wi-Fi. The device will prompt you to connect to a local network. Select your Wi-Fi network and enter the password. The system requires this connection to download its secure QR scanning tool.
- Scan the Configuration Code. Once the scanner automatically opens on your screen, point the device camera at the Provisioning QR Code on your configuration sheet.
- Allow the automated setup. The device will acknowledge the code and take over the configuration. It will automatically download the
validator application, install it, and configure the required administrative kiosk permissions. Any prompts that appear or requests for access, click “Next”, “Approve” and/or “Accept” accordingly. - Complete. Do not press any buttons during the installation process. Once the installation is finished you will be sitting in the Android launcher main screen. Swipe up from the bottom of the tablet to open the App Drawer and launch the netPark Validator Kiosk once manually to complete the conversion of the tablet to a kiosk. Once the netPark Validator Kiosk app is running wait 30s and then power cycle the tablet. When the tablet reboots after power cycling it will automatically start the netPark Validator Kiosk. At this point continue to the next steps for setting up the settings within the kiosk app.
Step 2. Configuring the Validation Scanner App
Once the Validation Scanner App is installed, you’ll need to configure the app. This can be done by simply scanning the Validation Configuration QR Code provided or manually by entering all necessary data manually into the configuration fields within the Validation Scanner App Settings menu.
Automatic Configuration using Validation Configuration QR Code
- Scan the Scanner SNAPI Setup Barcode with the hardware scanner to switch it into USB-SNAPI mode.
- On the validation tablet, tap the logo 10× to open Settings, then open Scan Setup QR Code.
- Scan the Configuration QR Code to load the preconfigured settings. The scanner should beep and you should see a green confirmation toast in the middle of the screen.
- Press Save in the app — the tablet will then say “Restarting” and will proceed to reboot.
- Upon rebooting, the app should automatically load into Kiosk Mode and launch the Validation Scanner App.
Manually Configuring the Validation Scanner App
Upon loading the app for the first time, you will be presented with a scanning screen and you will see a “Your Parking Co” logo on the screen; Tap that logo 10 times and you will be taken to the Settings screen.
You will be presented with a few options:
- Scan Setup QRCode – This is where you will configure your settings for the Validation Scanner app
- Scanner – This screen will allow you to debug and configure the Zebra scanner for the device.
- Set Settings Lock PIN – This is a dedicated panel to set the Settings Lock PIN for accessing this page
- Restart – This will force restart the Validation Scanner App
- Theme Settings – By default, the app will adjust it’s theming based on the System theme but you can force Light Mode or Dark Mode here if you prefer.
To manually configure the app, you’ll want to click into “Scan Setup QRCode” and then fill out the following information:
- Server API Key: This will be provided by netPark during your On-Boarding process
- Note: This API key will be the same across all Companies
- Company Pin: This can be found under Accounts > Groups & Companies > Select the Company being linked to this device and you’ll see a 12-Digit Alphanumeric “Pin” shown directly under the Company name in the top left corner
- Background Color (hex RRGGBB): Use the built in color-picker to select a background color or paste a 6-Digit Hex Code for the color of the background you would like
- Logo image URL: You can paste the URL of the image you want to display in place of the “Your Parking Co”; It is recommended that this logo be horizontal in layout for the best look.
- Settings Lock PIN: Enter a PIN here to make sure that the next time to enter into the Settings screen, it will require the PIN to login.
- Allows Scanning Tickets Only: Enabling this checkbox will put the device into Scan-Only mode, meaning customers will ONLY be able to scan their ticket to validate and cannot email and/or text themselves validations from this terminal.
- Show Available Count on Validation Buttons: When enabled, this will show the total number of validations remaining with that specific Validation group
- Beeper Enabled: This enables the built in “beep” that occurs when a scan is successful; Unchecking this option will silence the beep entirely
- Beeper Volume: If clients find the beep to loud and/or too quiet, you can adjust the volume here between Low, Medium and High