The Hamilton Transaction Kiosk (HTK) and Hamilton Cashless Transaction Kiosk (CTK) are the primary means of exiting a lot in a self park installation. The purpose of this device is to allow your customers to exit the lot by paying for their parking stay, either with a physical credit card, cash (with an HTK) or by a card-on-file through their profile or reservation.
Before you begin setting up your HTK or CTK device, you’ll need to have a few things:
- Lane number – This is defined within netPark on the Self Park screen and is typically setup by netPark
- Facility Code – If using RFID Prox, reference the facility code on the cards from your provider
- NIM IP – Provided by the IT team at your location to netPark. Once we have configured and shipped the NIM we can provide this IP upon request.
- Router/Gateway IP – Provided by the IT team at your location
- Subnet mask – Provided by the IT team at your location
- Controller IP – Provided by the IT team at your location (should be unique for each device)
Please note: The NIM IP, Gateway IP, Subnet Mask and Controller IP should all be provided by your IT team. netPark does not run or manage networks and cannot provide these details.
Setup the device in netPark
The first step in configuring a PEET device is to get setup all devices in netPark. This allows us to clearly id each device and makes it easier to manage the lot. To begin, navigate to the Self Park screen in netPark and click the “Add New” button. A window will popup with some questions about the device you are configuring. With this being an HTK/CTK device you’ll want to select either “Hamilton Transaction Kiosk (HTK)” or “Hamilton Credit Card Kiosk (CTK)”. Provide a clear description of the device (e.g. Lot A Left Exit).
Note: The Lane Number specified here is what we will use when configuring the HTK/CTK.
Configuring the HTK/CTK
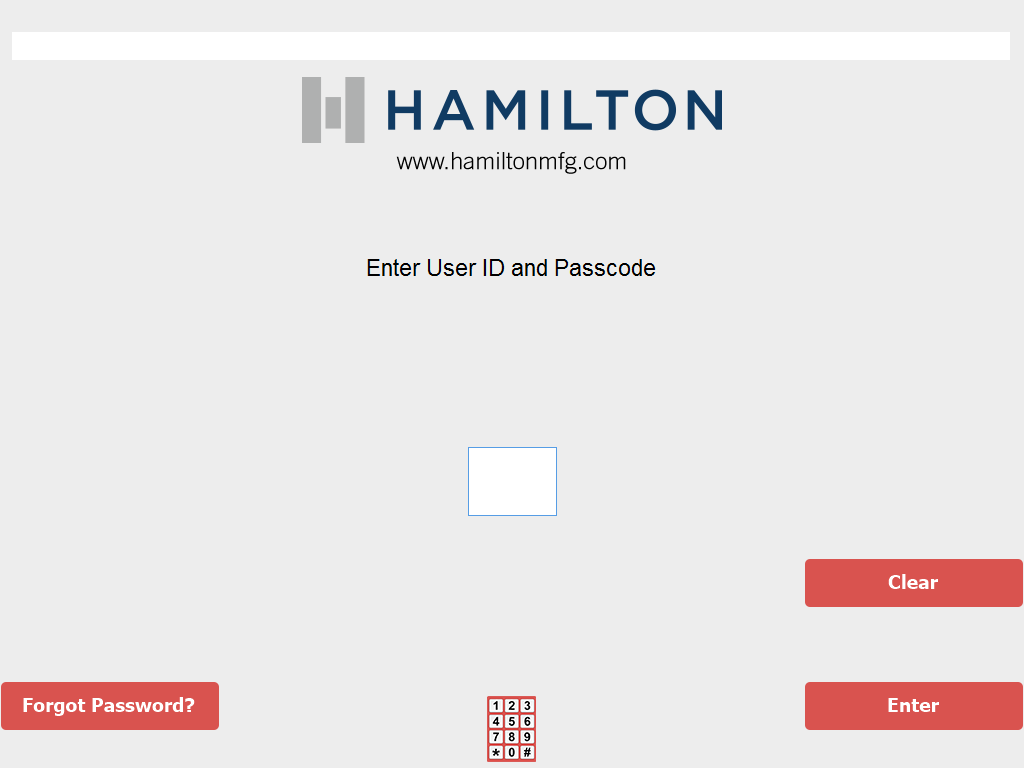
Configuring an HTK/CTK can take a bit of time, but is pretty easy. To begin you will need to need to put your HTK or CTK into administrative mode. On the HTK this is done by inserting the key into the lock cylinder and turning the key straight up or straight down until you hear a click. In the CTK there is a switch that can be toggle to “Program” or “Main”. Setting the switch to “Program” will load up the Administrative screen.
Overview and Configuration
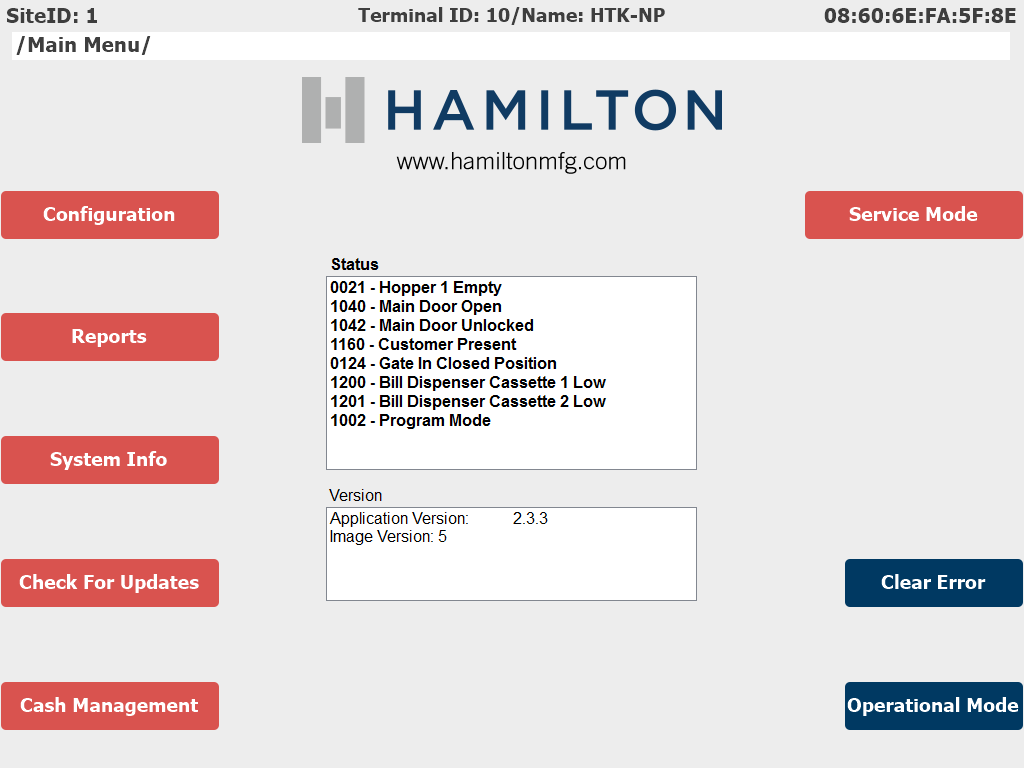
After logging in you will be shown the status and administrative page of the HTK/CTK. This page is a quick overview of the status of the device as well as any other relevant details. From this page we can access the “Configuration” screen which will allow us to change all of the settings for the device.
Click on Configuration > Application > Netpark. This page contains all of the major settings related to the netPark configuration of the Hamilton device.
Settings Configuration Screen
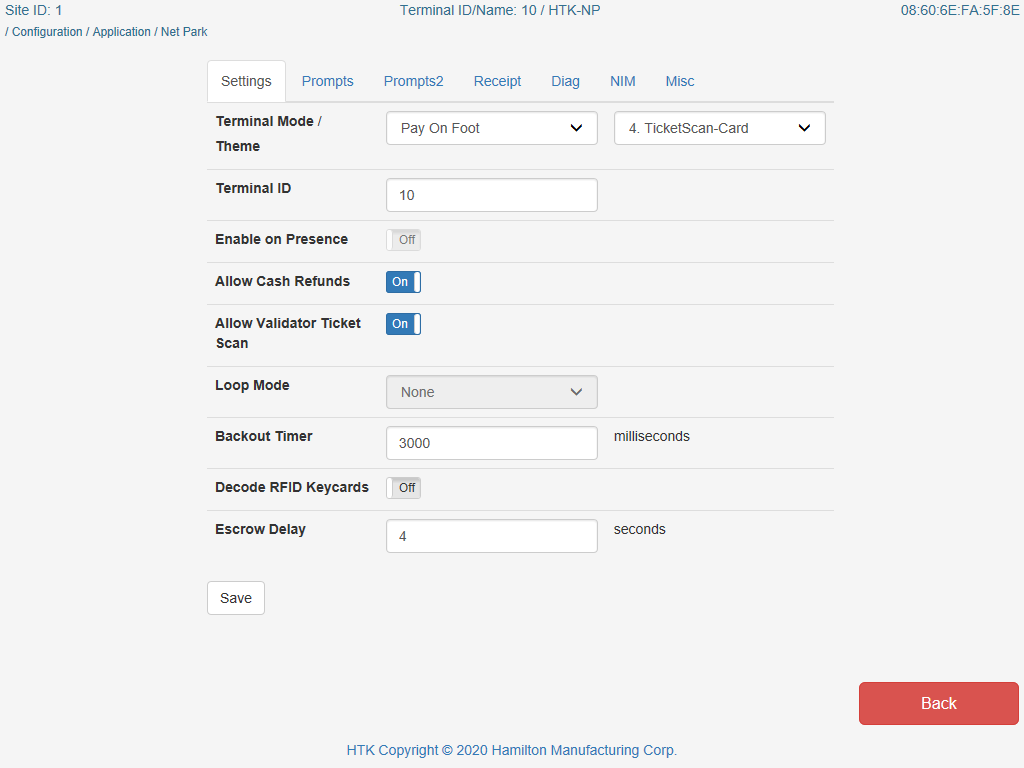
The Settings tab contains most of the general setup for the device, including setting the theme files, Terminal (Lane) ID, loop modes, etc.
1. Terminal Mode / Theme:
- Pay on exit: Customer pays and immediately exits
- Pay on foot: Customer pays and has to go to their vehicle to leave
- Pay on entry: Customer pays when entering the lot instead of exiting
There are 4 options for the Theme of the device
- TicketInsertScan: Cash-Card – Customer can pay using cash or credit card after either inserting or scanning their ticket
- TicketInsertScan: Card – Customer can only pay using a credit card after either inserting or scanning their ticket
- TicketScan: CashCard – For this option customers can only scan their ticket before paying with either paying with cash or credit card
- Ticket Scan: Card – This option only give the customer the choice to scan their ticket before payment
2. Terminal ID: This is going to be the number of the lane that you have set up within the Self Park screen of netPark
3. Enable on presence: You will most always want this to be turned on as this will bring up the “Waiting for vehicle” screen when the presence loop is not activated.
4. Allow cash refunds: If your location is using the Cash Card setup this setting allows you to give the customer cash back if they don not insert the exact amount
5. Allow Validator Ticket Scan: If your device is configured to scan tickets from your entry PEET device than you will want to turn this on
6. Loop Mode: There are few different options for how the HTK device will be triggered when a vehicle approaches or exits the device triggering area.
- None
- One Loop Presence
- One Loop Safety
- Two Loops Close
- Two Loops Far
7. Backout Timer: In the result of a customer backing out of the exit area, you can configure the time that the device is reset using the Backout Timer option
8. HID Facility Code: If using HID card with an encoded facility code, input that value here
Note- You can also leave this value set to “1” and it will accept any facility code
9. Allow Offline RFID: In the event of the device going offline, this will allow RFID scans to enter/exit the facility
10. Escrow Delay: Leave at default value
Once the settings are put in all that is left on this page is to click on the Save button and then click on Activate Changes.
Prompts 1 & 2 Configuration Screen
Once the Settings tab is configured and activated you can move on to the Prompts tab.
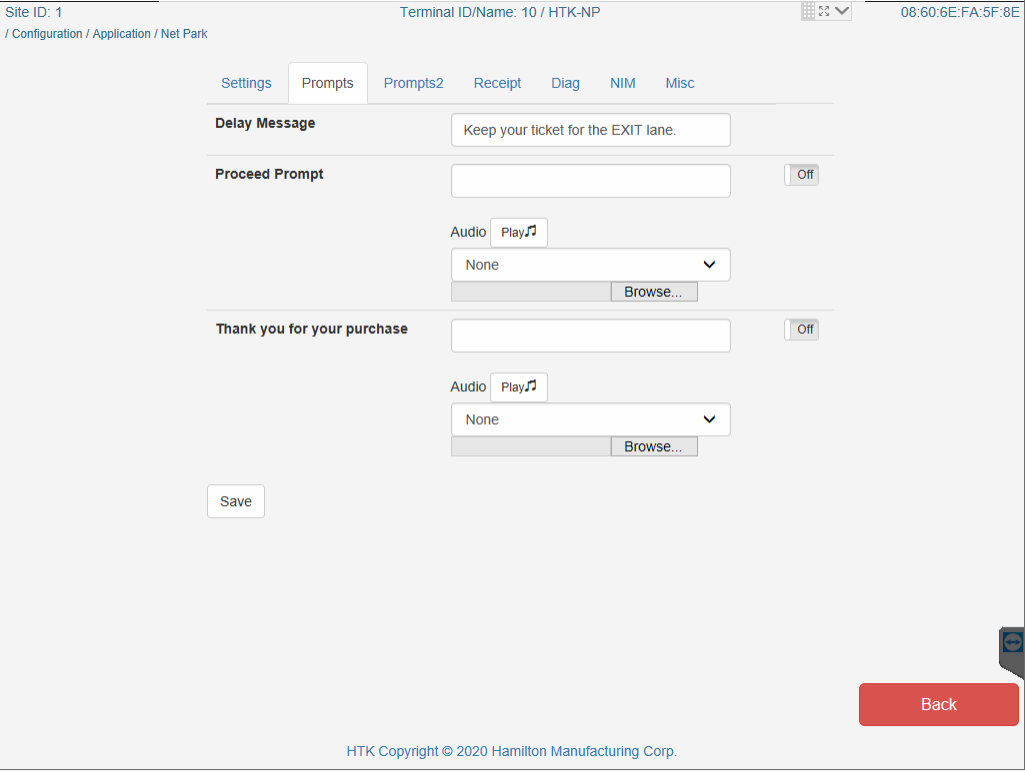
Via the Prompts tab you can start to configure the Delay Message, Proceed Prompt and the Thank you Prompt.
- Delay Message: The message that is displayed to customers when the HTK/CTK is configured for entry mode after the customer pays for their ticket
- Proceed Prompt: Leave as default
- Thank you for your purchase: Leave as default
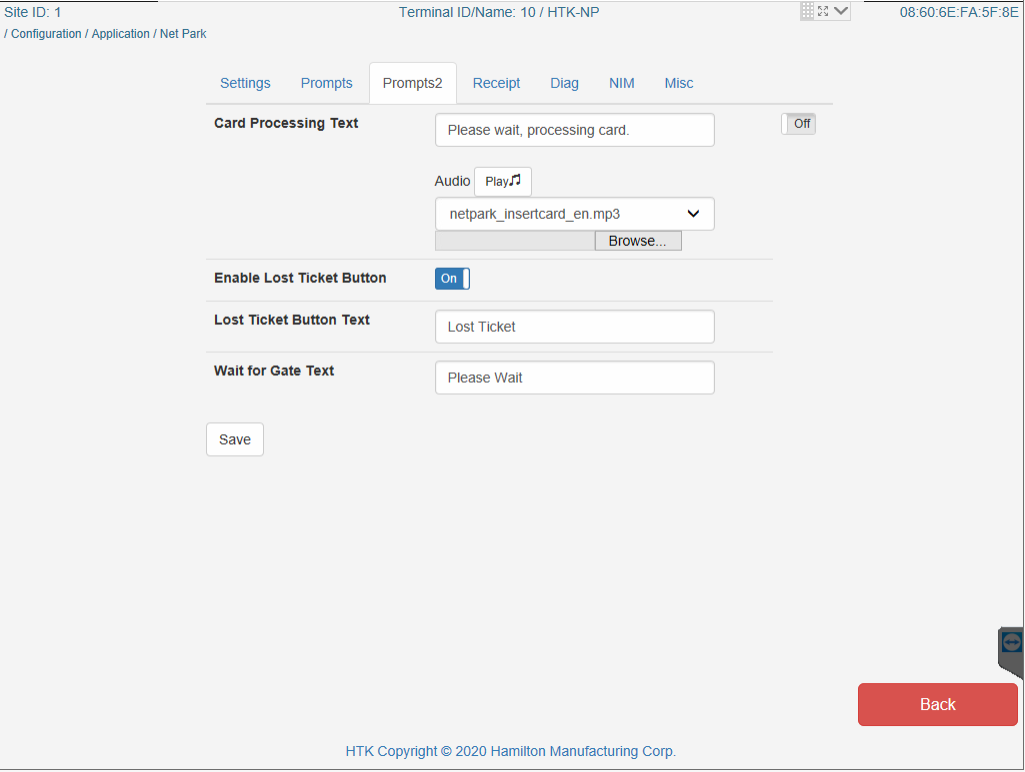
You can continue right to the Prompts 2 tab for the second part of prompts. These prompts contain configuration for the Lost Ticket and the transaction process text
- Card Processing Text – This is the message that is displayed on the HTK/CTK screen when a card is being processed
- Enable Lost Ticket Button – Enable/Disable the Lost Ticket button on the HTK/CTK screen
- Lost Ticket Button Text – You can create the text that is displayed on the Lost ticket button in this field
- Wait for Gate Text – The message displayed after payment is received
Once you have made your changes remember to click Save and then click on Activate Changes
Receipt Configuration Screen
Now move over to the Receipt tab of the HTK/CTK setup. This tab entails the configuration of the receipt text and settings.
- Take Receipt: You can leave as default
- Ask Receipt Button: You can Enable or Disable the Print Receipt Button for the exit lane
- Make sure to select, “PressPrint_en.mp3” for the correct voice-over
- No Receipt Button Text: Here you can change the text that displays on the No Receipt button option
- Ask Receipt Prompt: Leave as default

NIM Configuration Screen
The NIM tab is the next tab that you will want to choose to to configure the NIM settings and make sure that the HTK/CTK can communicate with the netPark software system.
- Current NIM: The currently assigned NIM IP address.
- IP Address: Allows you to modify the assigned IP address of the NIM. Once you put in the IP address of the NIM you will want to click on the Configure NIM button. This will get the communication started with the NIM
- Encryption Key (LEGACY SETTING): The credit card encryption key for the device. Once you have this number, you can either call or email netPark support with this key. This key must be entered into the device settings of the HTK/CTK within the netPark system before payments can be processed properly. This setting is ONLY used for legacy Monetra credit card processing systems and can be ignored otherwise.
- Generate New Key will erase the existing encryption key and a new key will be generated. The new key will then need to be entered into device settings of the HTK/CTK within netPark

Setting a Static IP Address in Windows
The CTK/HTK requires that a Static IP address be assigned to the device for proper communication. This process requires logging into the Windows side of the controller and manually configuring the Static IP address within the Network Configuration
Loading into Windows
From the configuration screen after logging into the controller, you’ll tap on “Service Mode” or “Op Reboot” (This button label changes based on the firmware version of the controller) in the top right corner. This will reboot the controller into Windows.
Once you see the Windows login screen, select “Hamilton Administrator” for the user and enter the password provided by netPark to login to Windows. Once you see the Windows Desktop, you can move onto the next steps.
Setting the Static IP
Once inside of Windows, you’ll want to follow the below steps (Referencing the images on the right) to configure the Ethernet connection of the device to the required Static IP information.
Please follow the steps below:
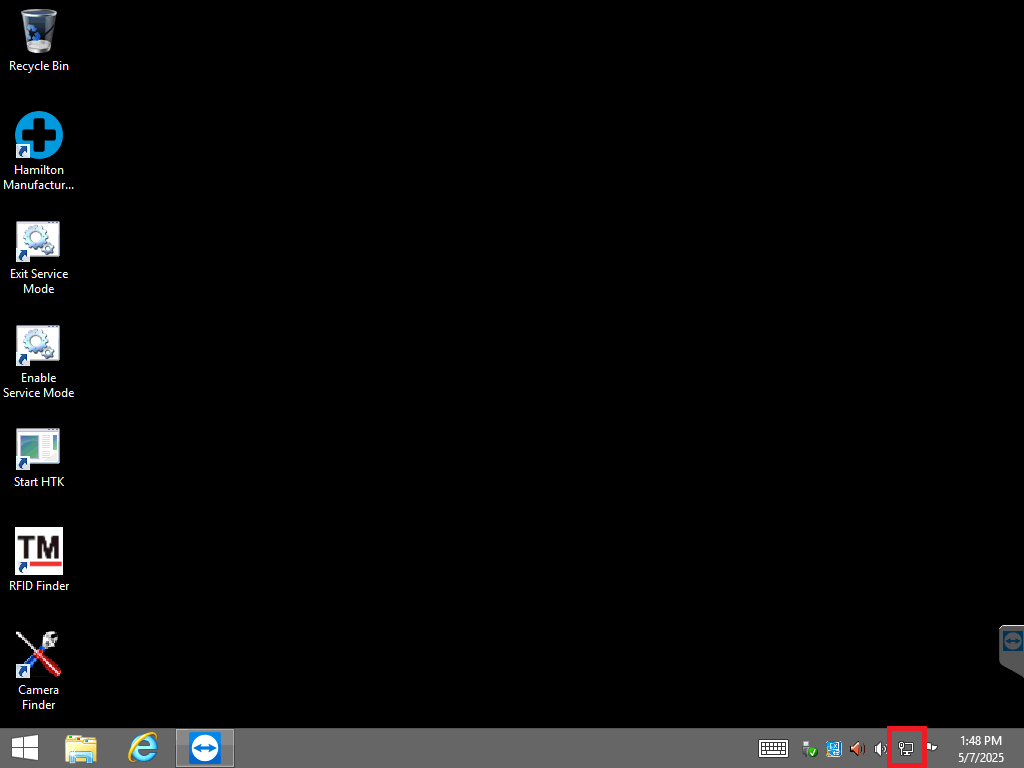
- Find the Network Connection icon in the bottom right corner within the System Tray.
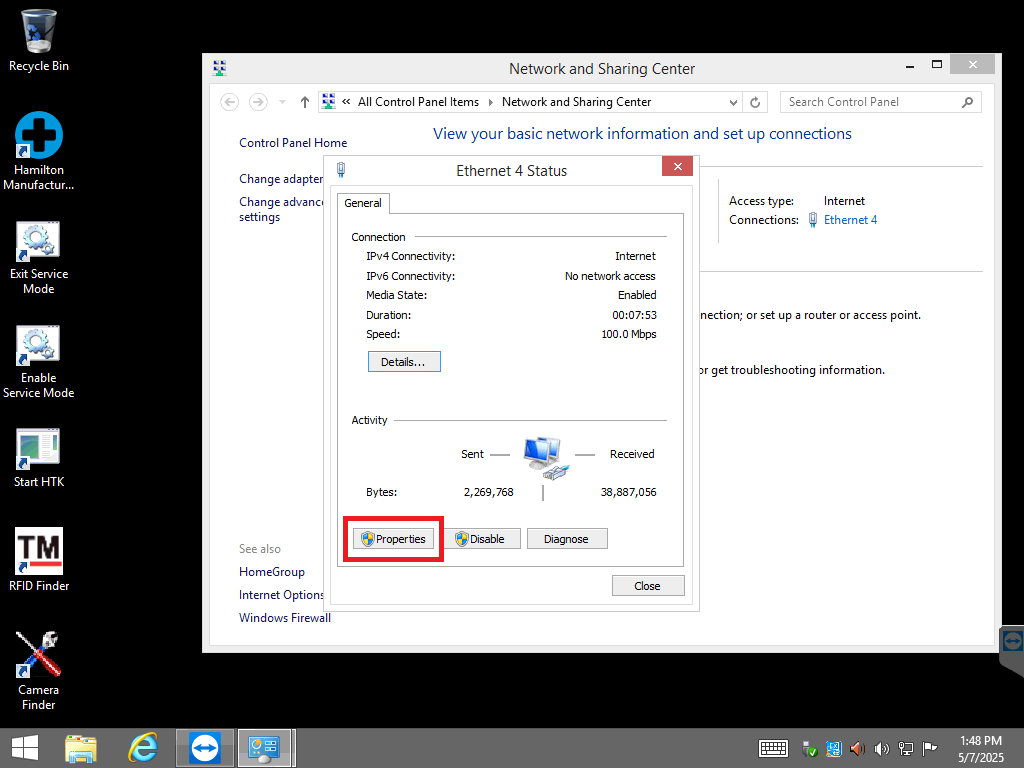
- Right-Click on the Network Connection icon and select Open Network and Sharing Center from the dropdown that appears.
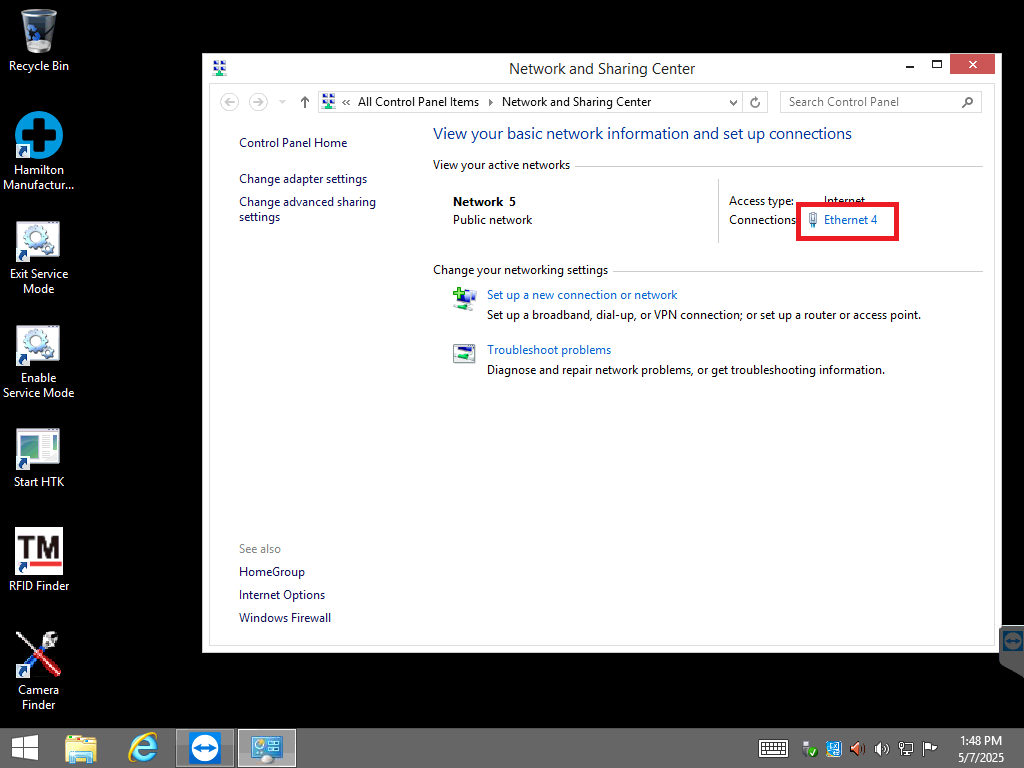
- Find where it says Connection and click on Ethernet X with the X being the number listed; This value can be different from device to device.
- Within the pop-up that appears, click on Properties in the bottom left corner.
- Using the scroll-bar, scroll down until you see Internet Protocol Version 4 (TCP/TPv4) and then click on Properties.
- Within the pop-up that appears, click on “Use the following IP address” and fill in the network information for the device, making sure that all fields are filled out:
- IP Address – The Static IP you are assigning to the device
- Subnet Mask – This is generally 255.255.255.0 but make sure to verify with your IT
- Default Gateway – The Gateway for the Static IP you are setting. This will GENERALLY be the same as your IP Address above but will normally end in “.1”
- Preferred DNS Server – This is generally 8.8.8.8 but make sure to verify with your IT
- Alternate DNS Server – This is generally 8.8.4.4 but make sure to verify with your IT
- Once you have entered all of the network information, click on OK and then OK again when the previous pop-up appears.
- Note: The system may hang for a second after pressing the second OK while the Static IP Address is assigned.
- Once everything has been set properly, you can close out of all of the pop-ups and then click run the Exit Service Mode file on the Desktop to reboot back into the device software.
If all of the network information was set properly and all of the above steps were already completed, your device should now be showing online within netPark.
If the device is not online, please double check that all of your settings within Configuration > Settings > netPark are set correctly, paying special attention to the Terminal ID and the NIM IP.
If you have confirmed all settings and are still having issues getting your device online, please reach out to netPark Support for assistance.
Below is an example of a properly configured Static IP address for reference:


Server Network Settings Configuration
NOTE: This screen should NOT need to be modified, as setting the NIM IP in the above NIM Configuration Screen section should set all of these values. This screen would only need to be adjusted in the event that the NIM IP address was changed after the fact.
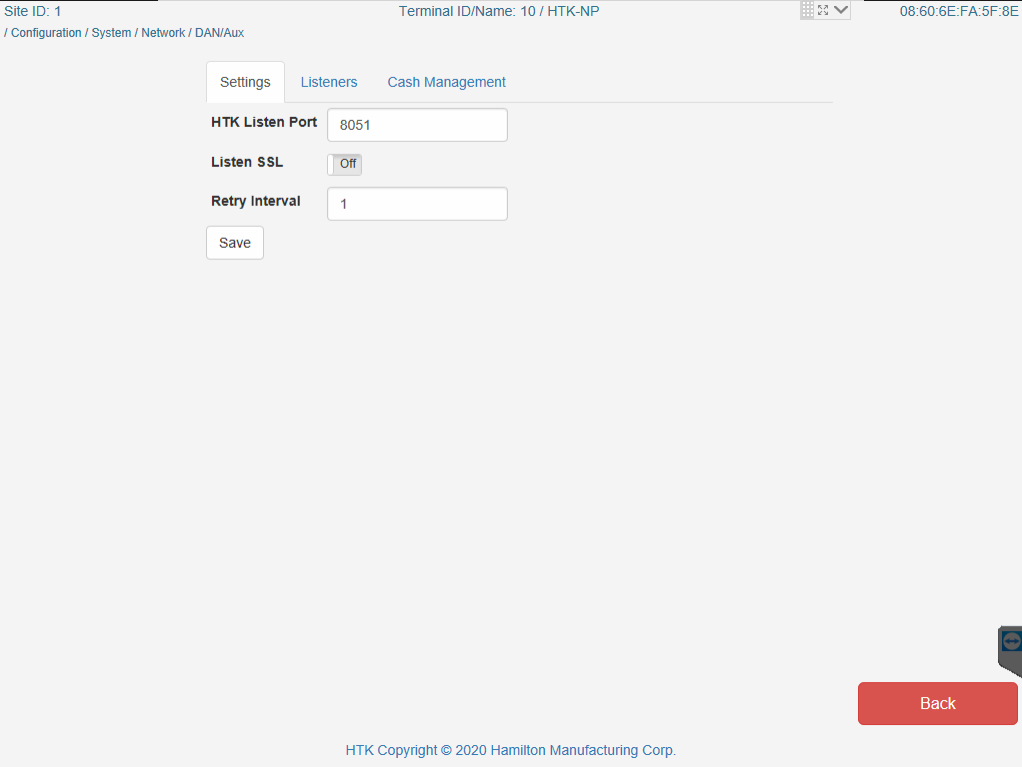
Click on Configuration > System > Network > DAN/AUX
You will want to start on the Settings tab to set these changes.
- HTK Listen Port: This should always be set to “8051”
- Listen SSL: This too should always set to “Off”
- Retry Interval: This should be left as default
Remember to click on Save and Activate Changes. Once this has been done, you can now move over to the Listeners tab.
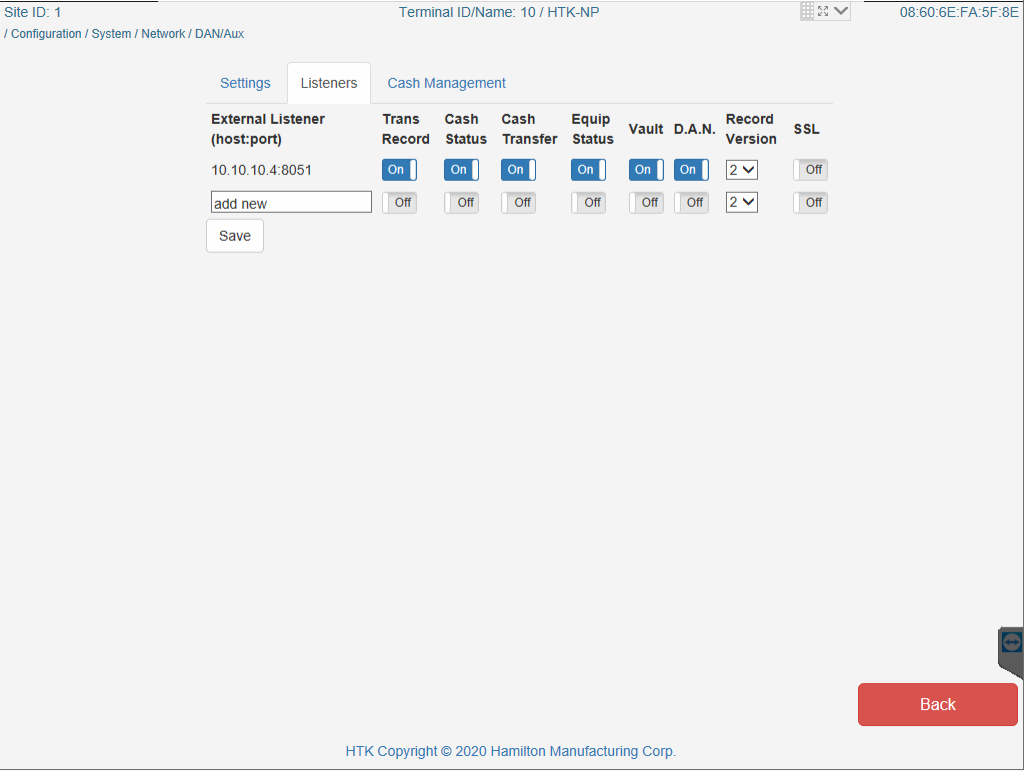
Note: Most all of the settings on this screen are already set for you. The only settings you really need to change are the Vault and the DAN switches, but check to make sure all the settings are set to the following.
- External Listener (host:port): [NIM IP Address]:8051
- Example: 10.10.10.4:8051
- Trans Record: On
- Cash Status: On
- Cash Transfer: On
- Equip Status: On
- Vault: On
- D.A.N: On
- Record Version: 2
- SSL: Off
Remember to click Save and then Activate Changes.
Credit Card Module Configuration
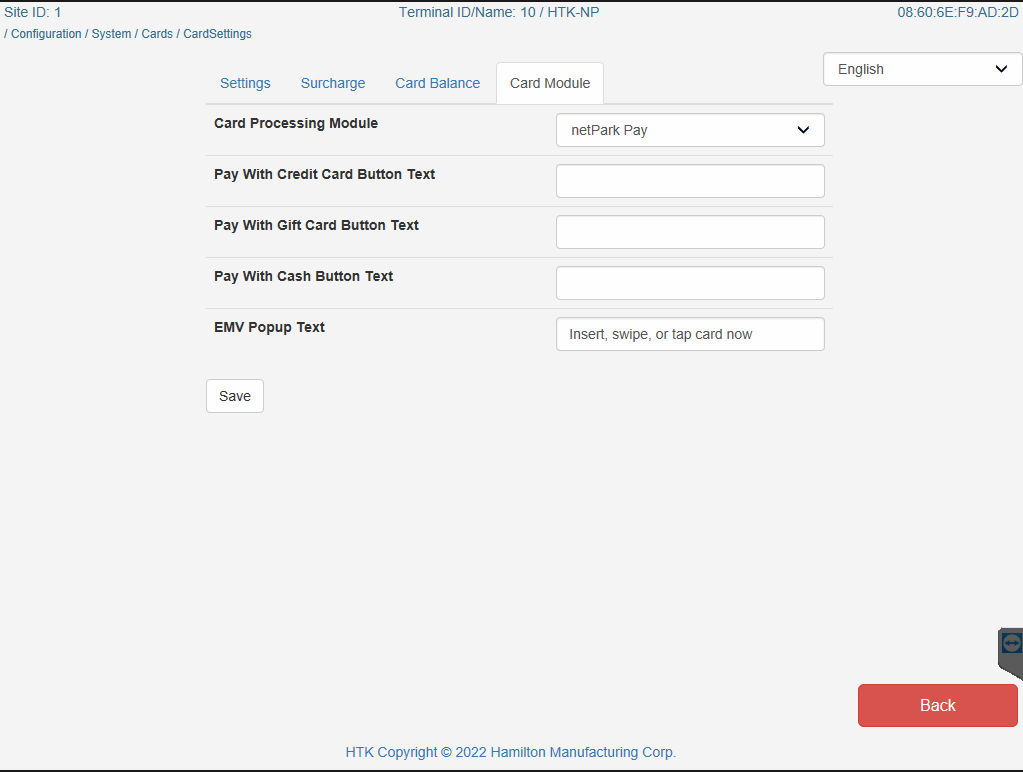
Click on Configuration > System > Cards > CardSettings. This screen allows you to set the credit card processing module.
- Card Processing Module: netPark Pay
- Pay With Credit Card Button Text: Leave as Default
- Pay With Gift Card Button Text: Leave as Default
- Pay With Cash Button Text: Leave as Default
- EMV Pop-Up Text: Leave as Default