Conversion Process
netPark Pay is netPark’s new payment processing solution. As part of this rollout, netPark is working with our clients and their installers to get the HTK & CTK Self Park devices updated. This guide walks through the conversion kit as well as the process that an installer would need to run through in order to perform this conversion.netPark Pay Conversion Kit
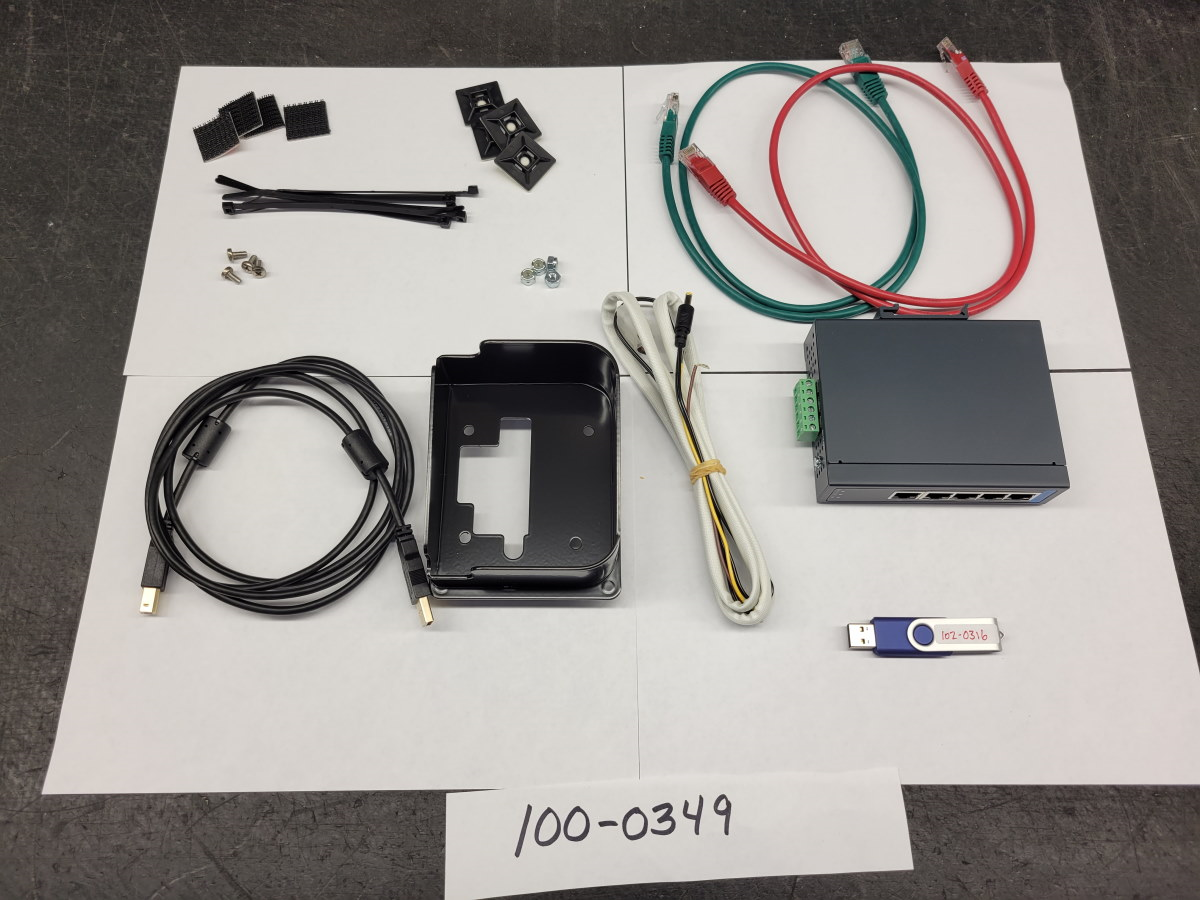
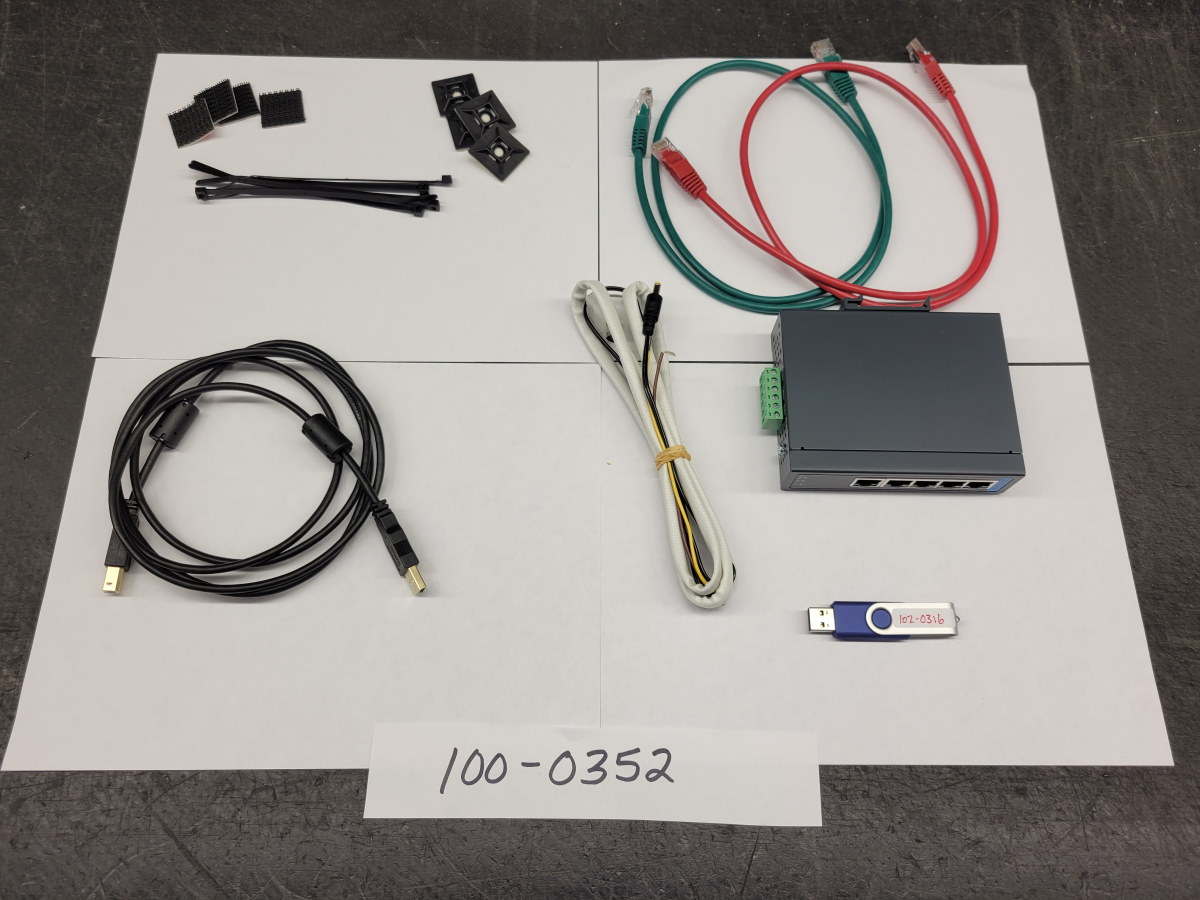
- 6′ USB Cable A/B Male: Power for Card Reader
- iUC285 Mounting Bracket: Replaces Swipe bracket (excluded if EMV bracket already installed
- 3′ (Green) Patch Cable: Network cable for Switch to Controller
- 3′ (Red) Patch Cable: Network cable for Switch to DataCap Server
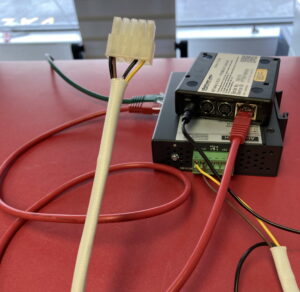
- 5 Port Industrial Ethernet Switch: Used to
- Power Harness: Power cable for Switch & DataCap devices
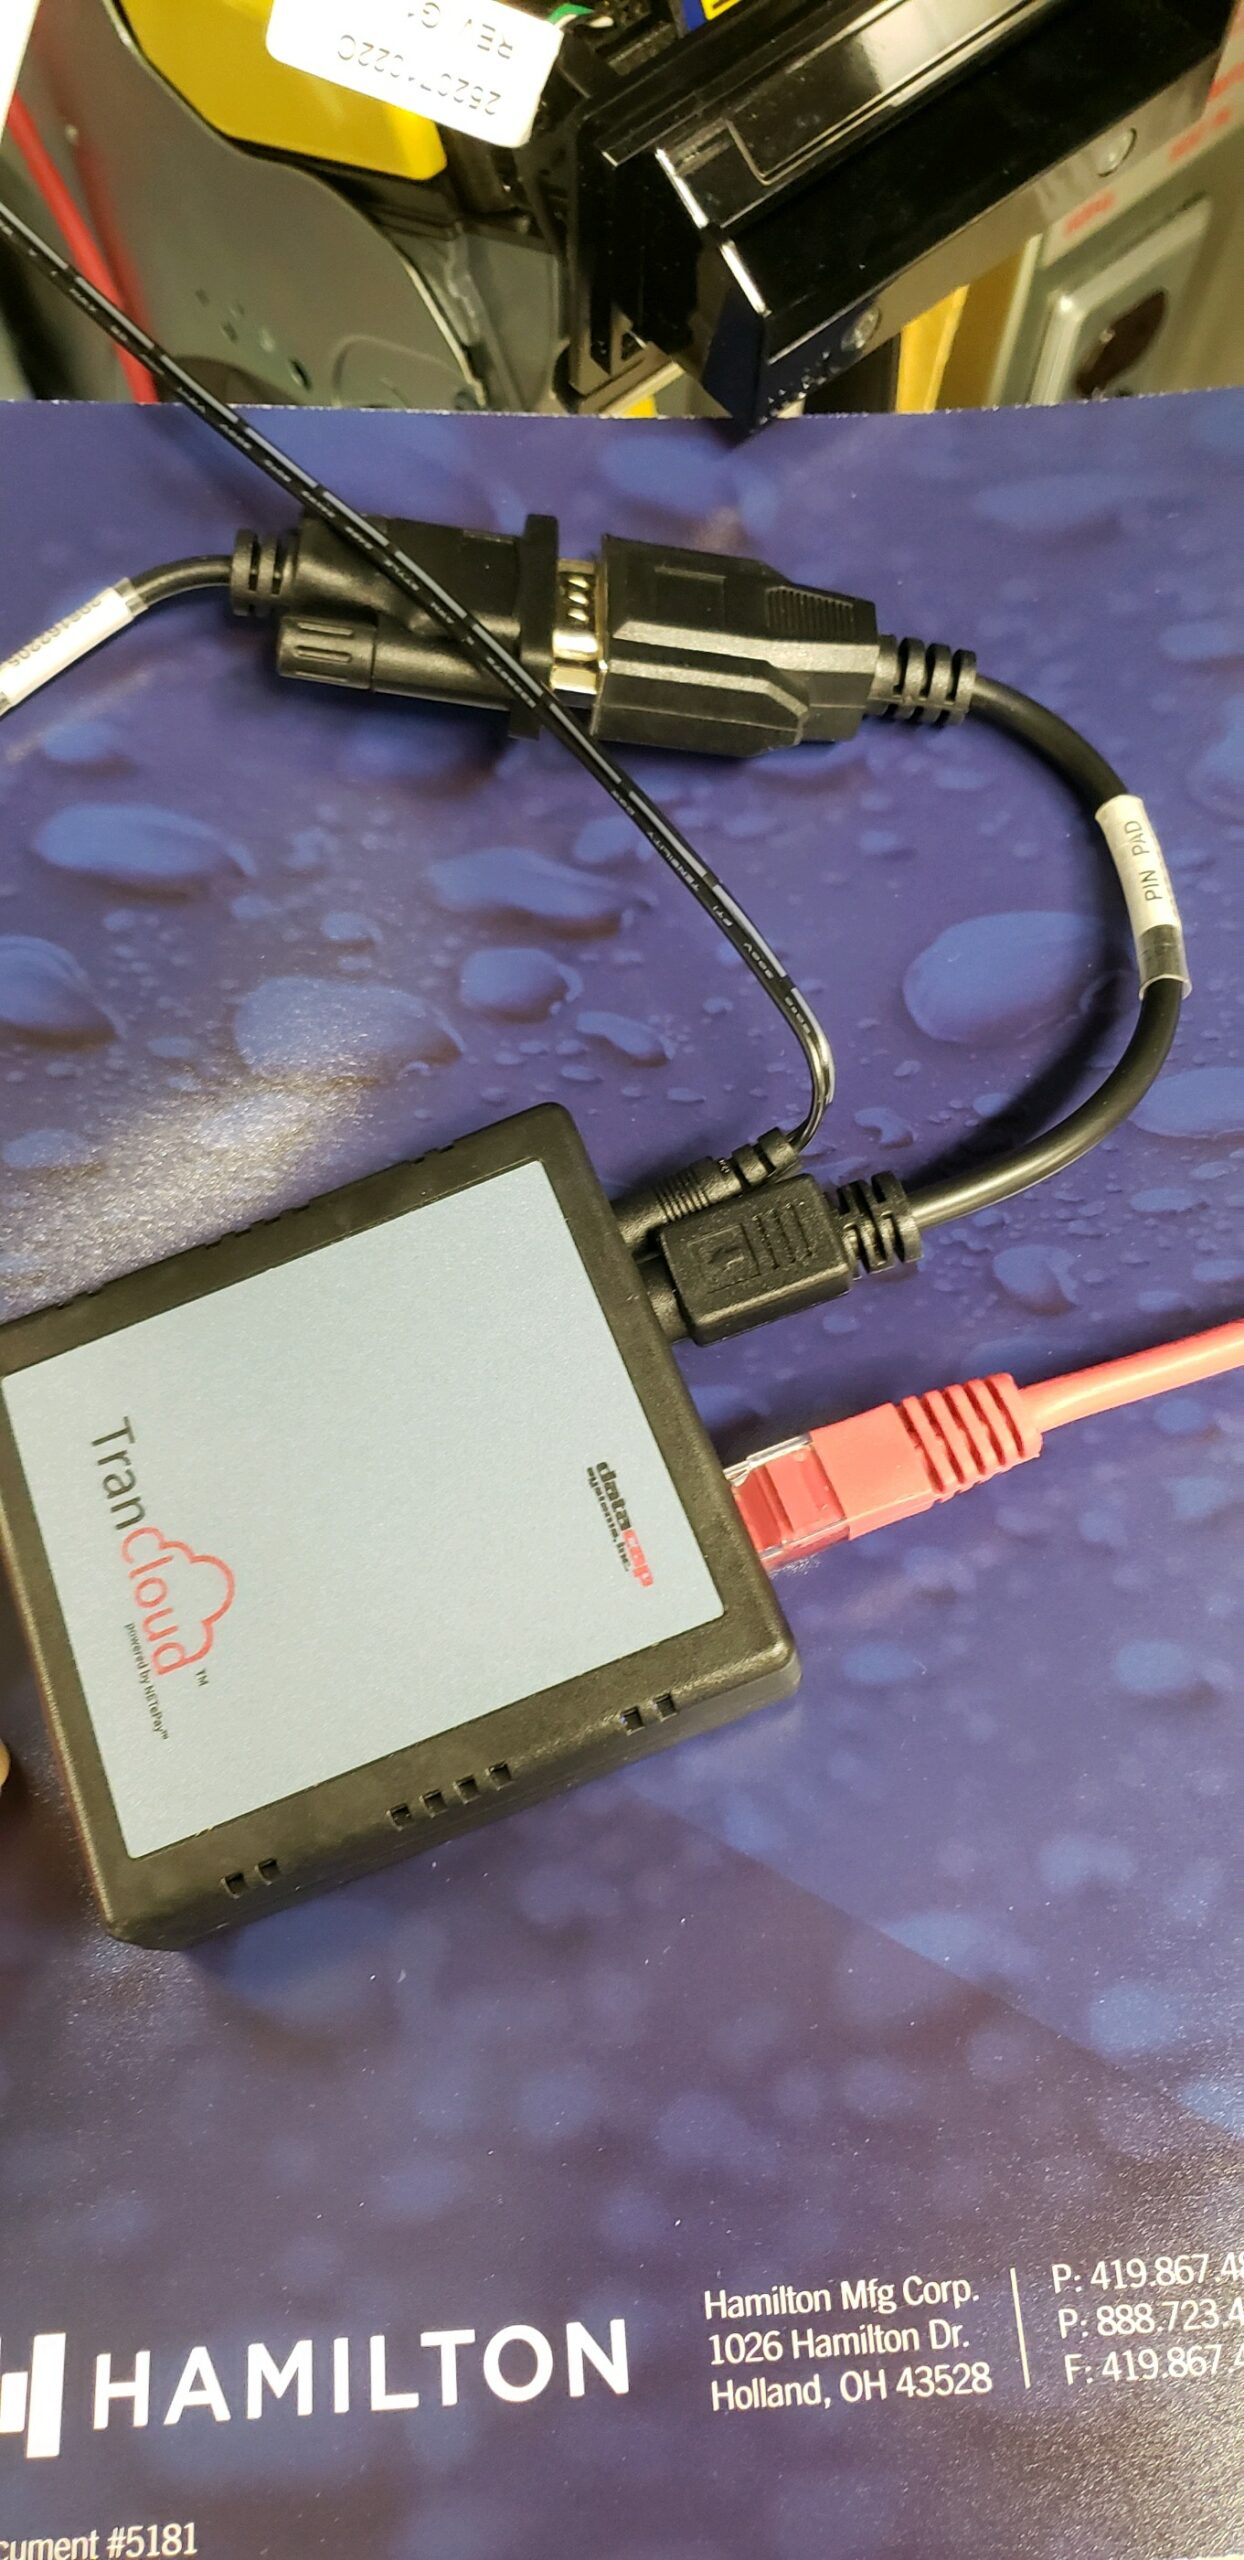
- RJ12 to DB9 Cable: EMV Reader -> Datacap data cable (Part 1)
- DB9 to Mini DIN: EMV Reader -> Datacap data cable (Part 2). Connects to RJ12/DB9 cable.
- Necessary screws, nuts, self-adhesive mounting pads, and cord ties: Used for organizing the cables/devices
- Hamilton Thumbdrive with Firmware updates
Network Requirements
Before beginning hardware swap, ensure that the network is properly configured as shown below, or the CC EMV terminal will not function. The EMV readers require additional ports to be configured before use. These ports are already documented in our System, Hardware and Network Requirements guide, but are listed here for brevity.- Outbound TCP 443 to “iptran1.dsipscs.com“
- Outbound TCP 443 to “iptran2.dsipscs.com“
- Outbound TCP 5080 to “trancloud.dsipscs.com“
- Outbound TCP 443 to “prod.ssl53.com“
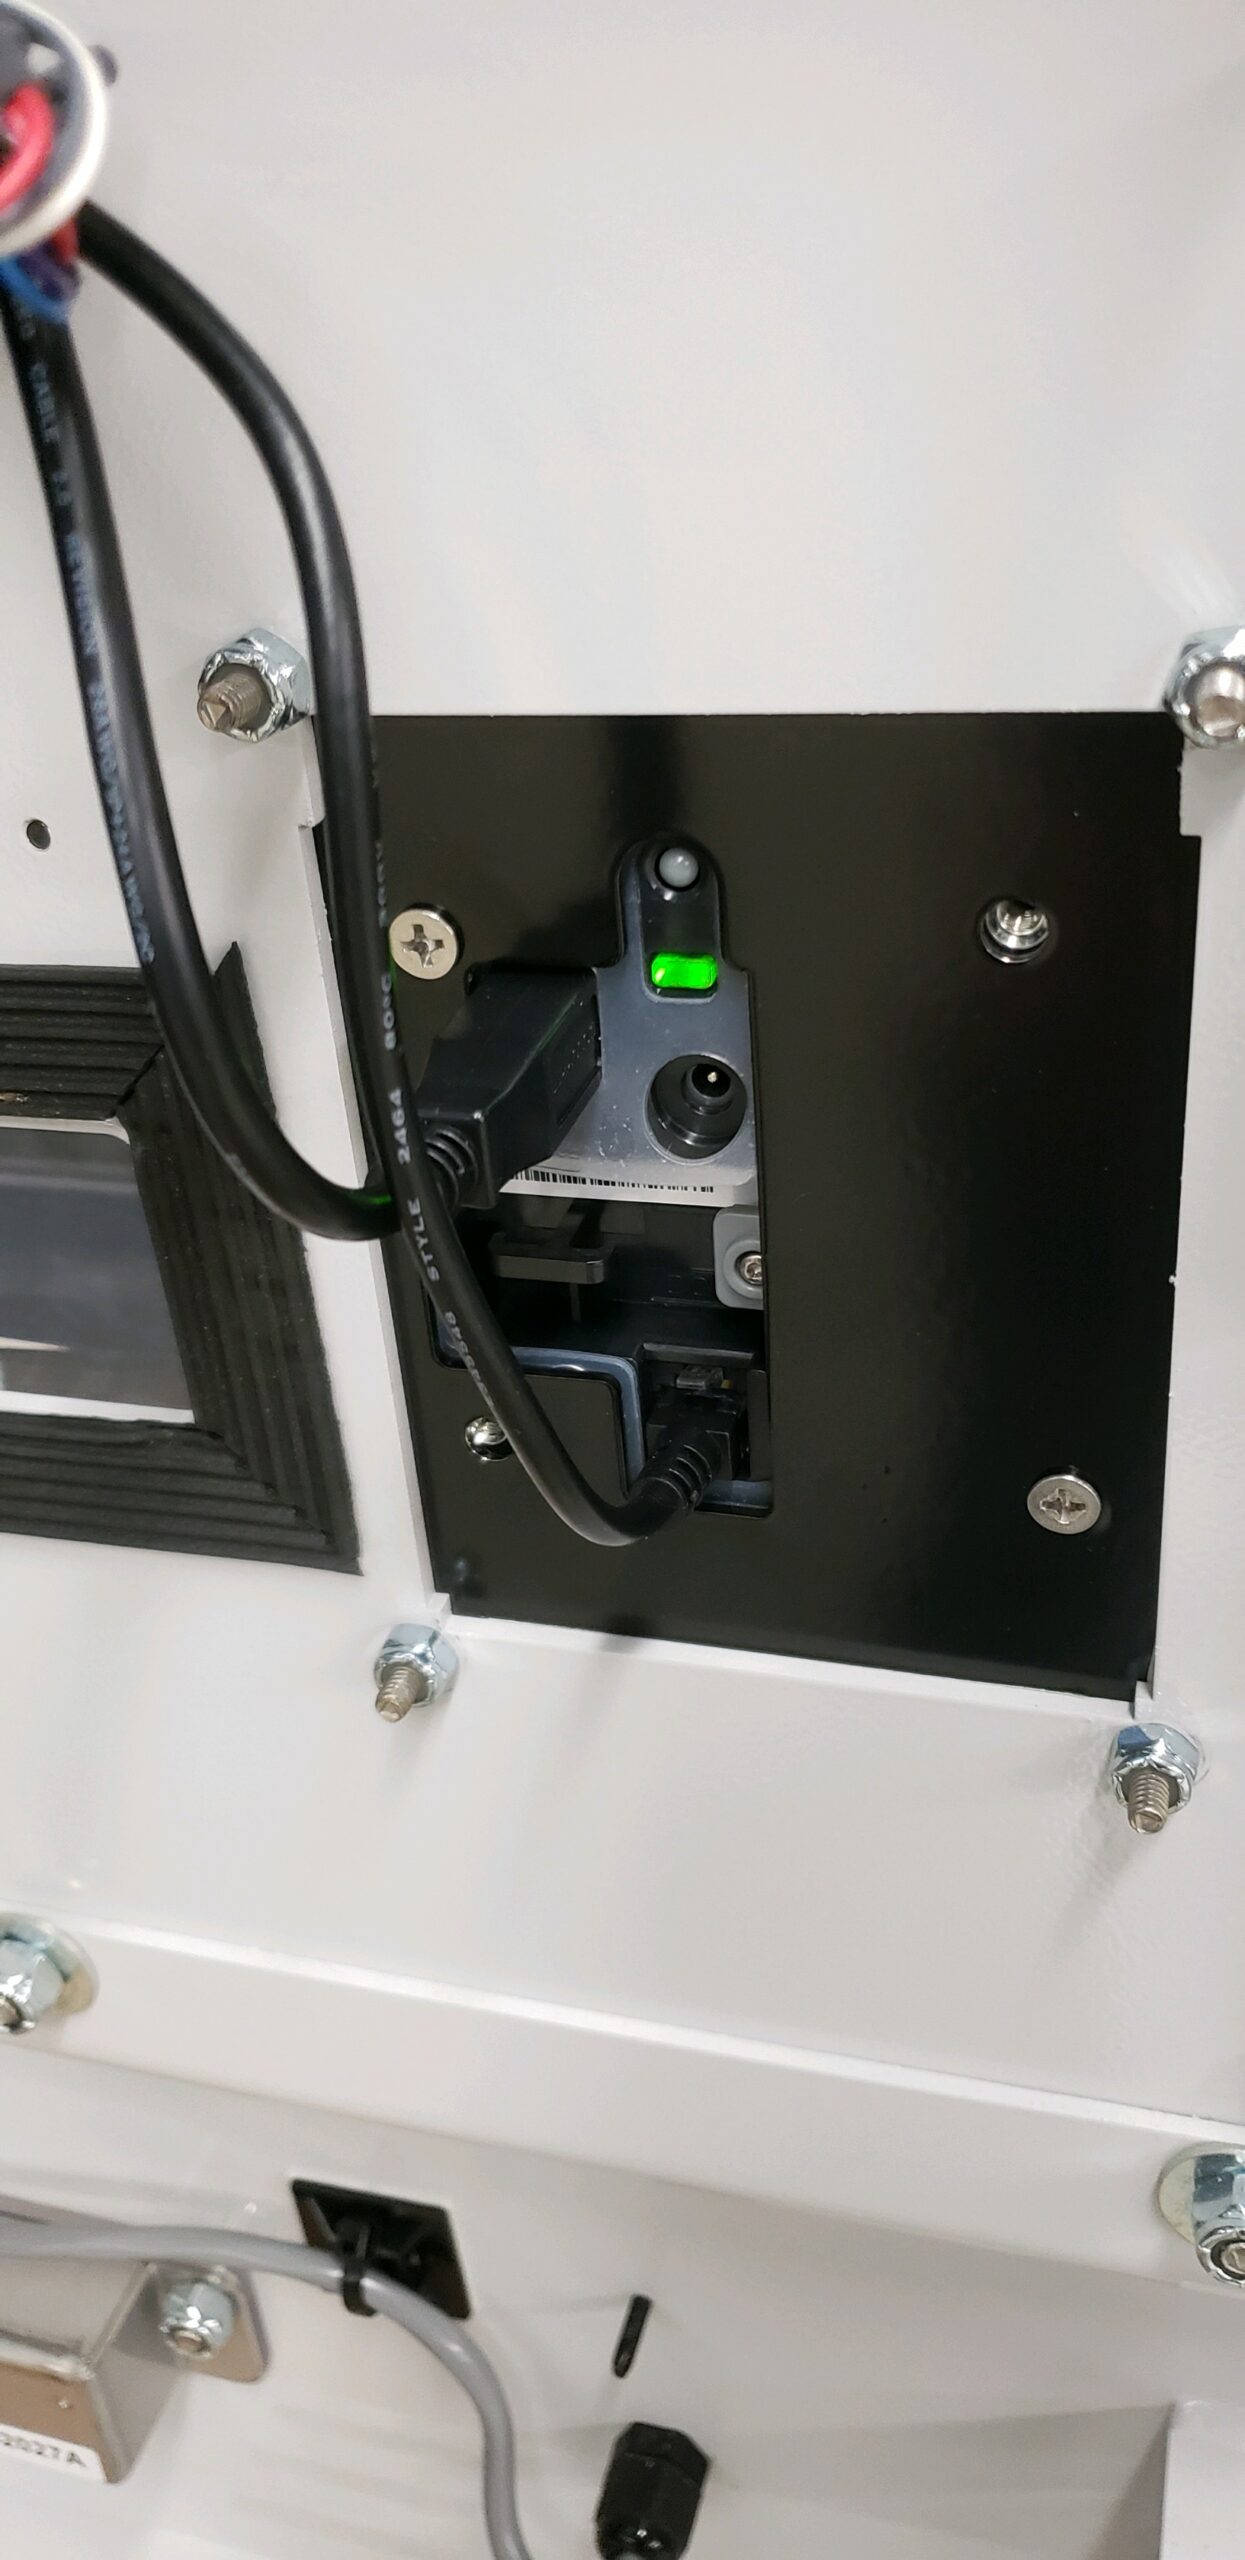
Hardware Installation
This section details out the process of installing the conversion kit. Please follow this list carefully to ensure the best and easiest conversion.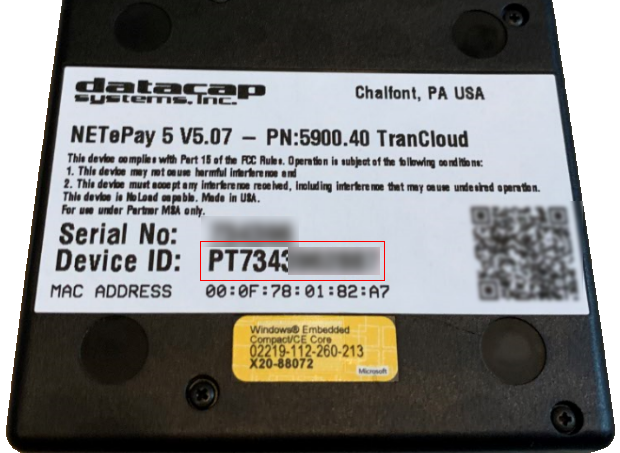
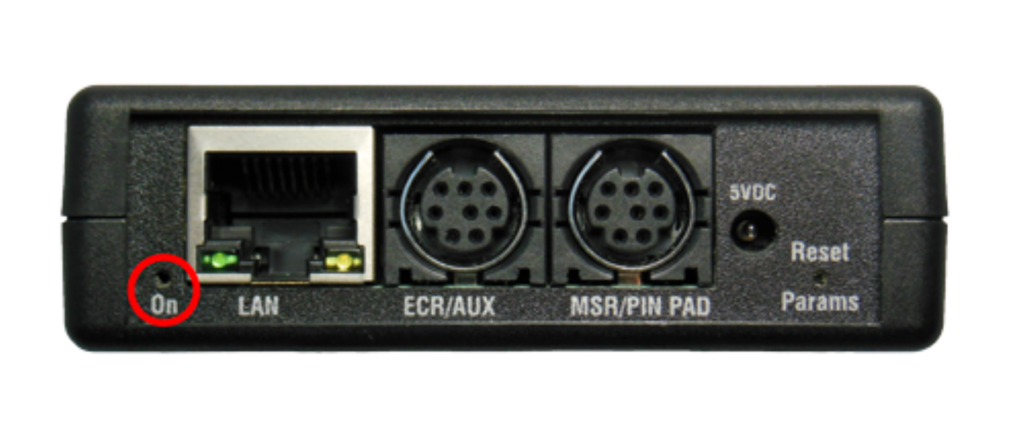
- Power down HTK/CTK
- (Important) Write down or take photo of “Device ID” from the back of Datacap Device
- Mount Datacap device to side using self-adhesive mounting pads (write down “Device ID” on back first)
- Mount Ethernet Switch to DIN Rail (if available)
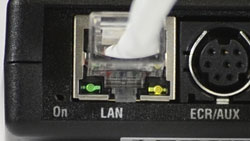
- Disconnect the network cable from the controller and plug into the bottom port of switch
- Connect Green patch cable from second port from bottom to the controller
- Connect Red patch cable from third port from bottom to the Datacap Device
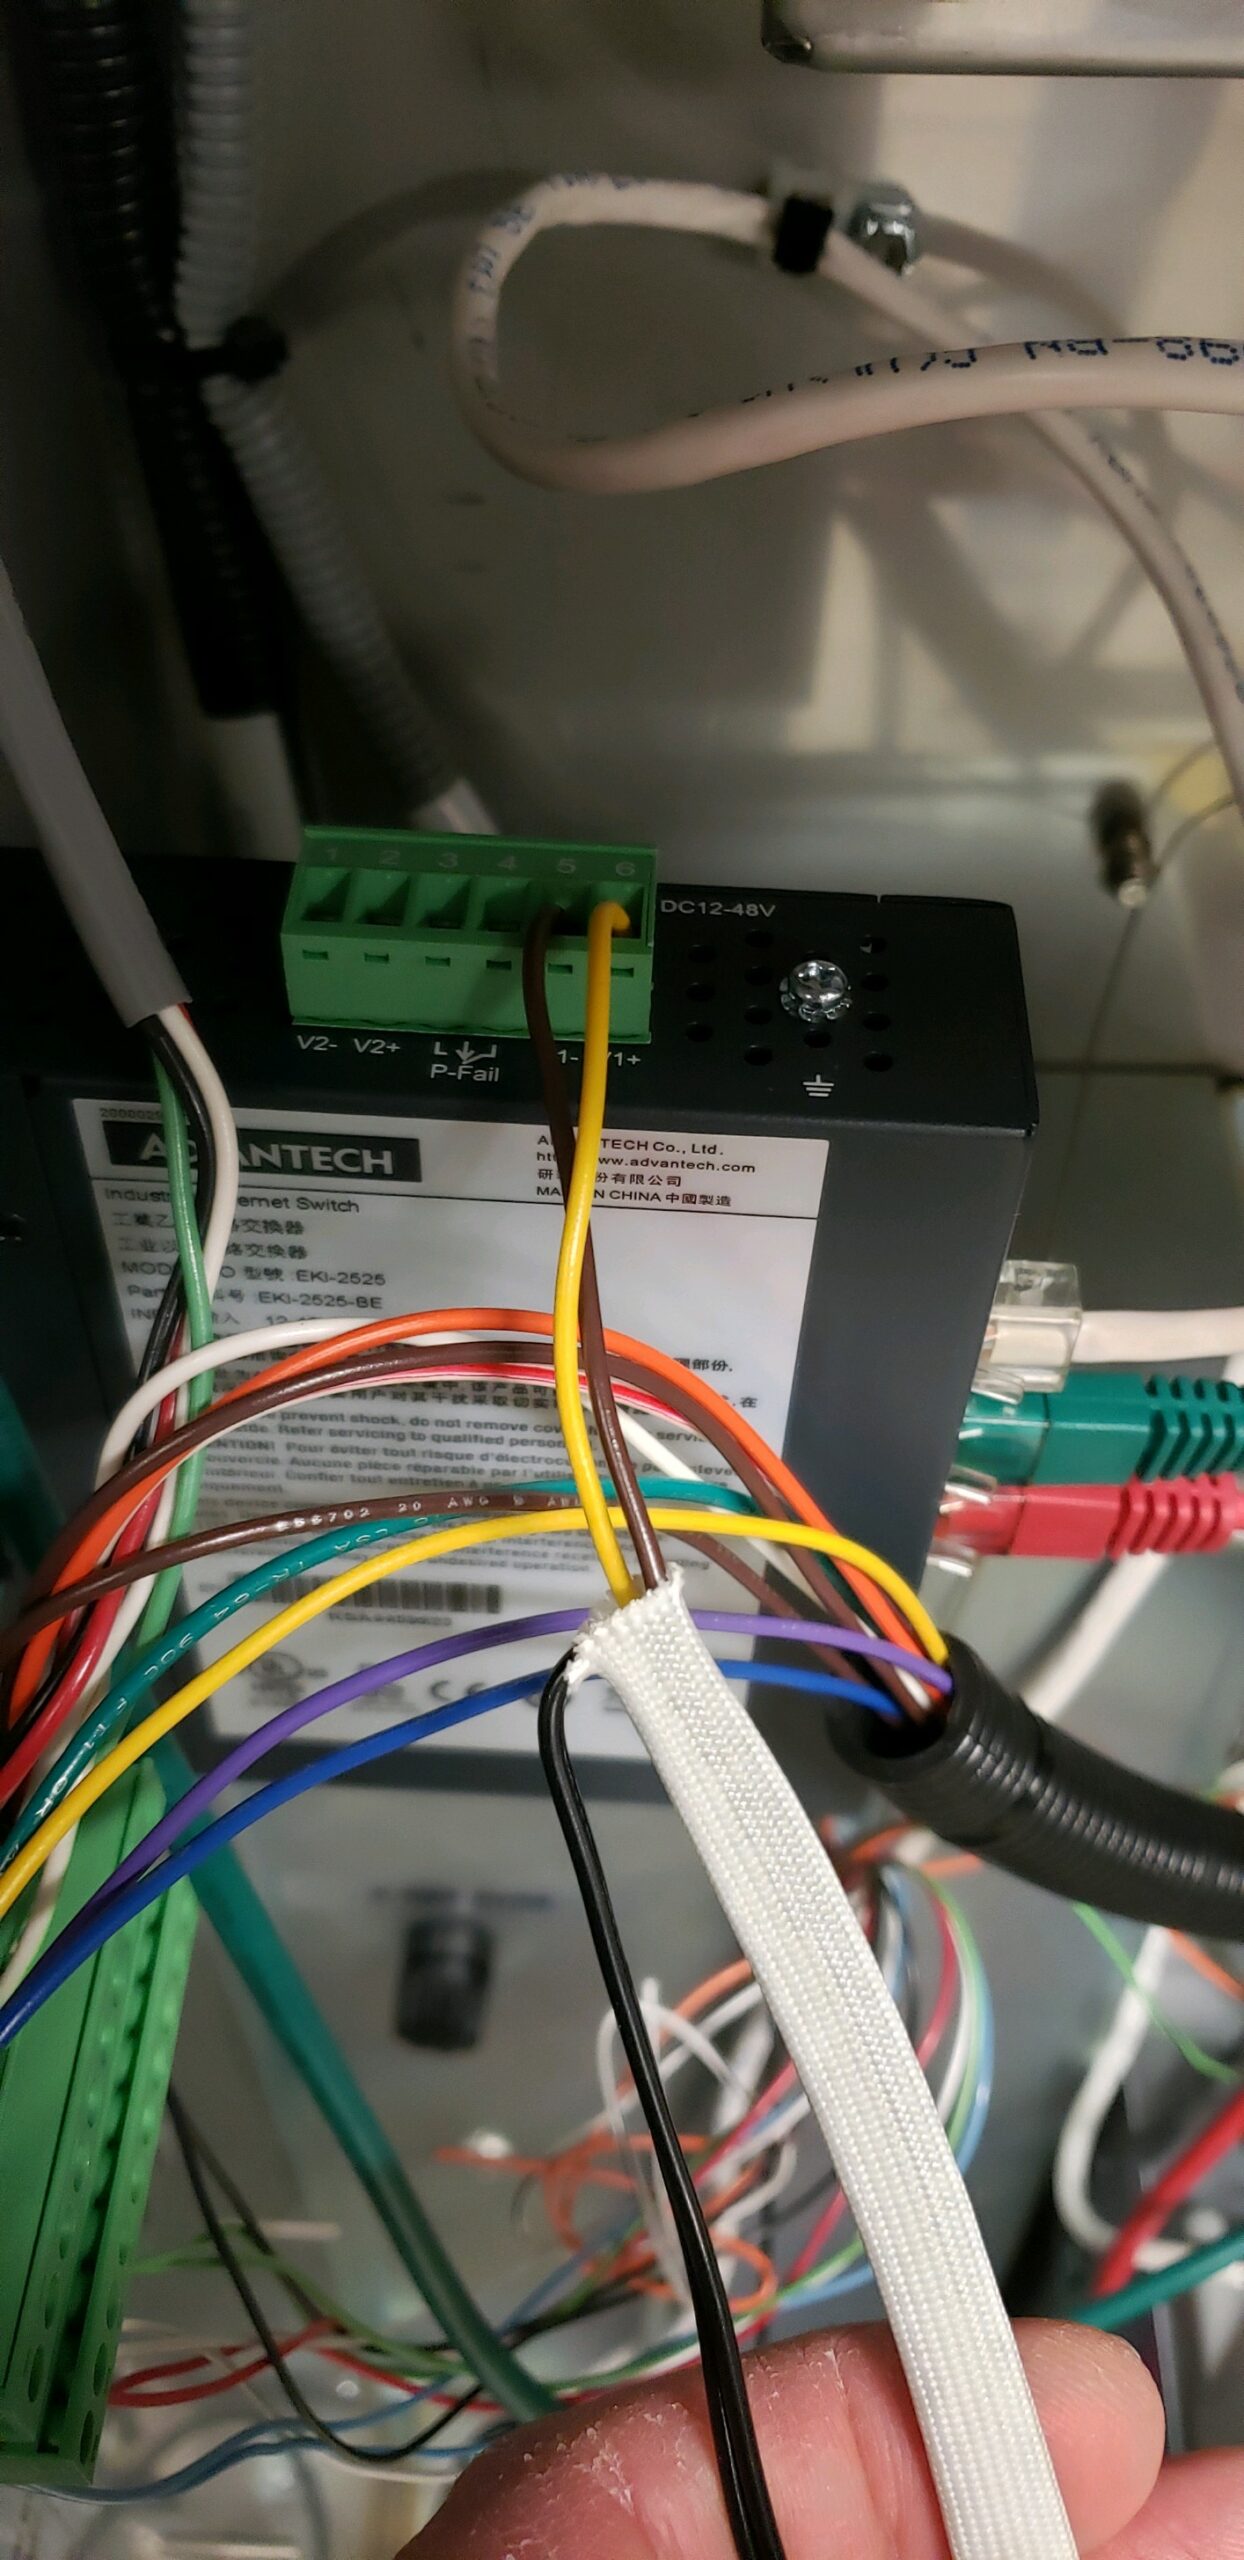
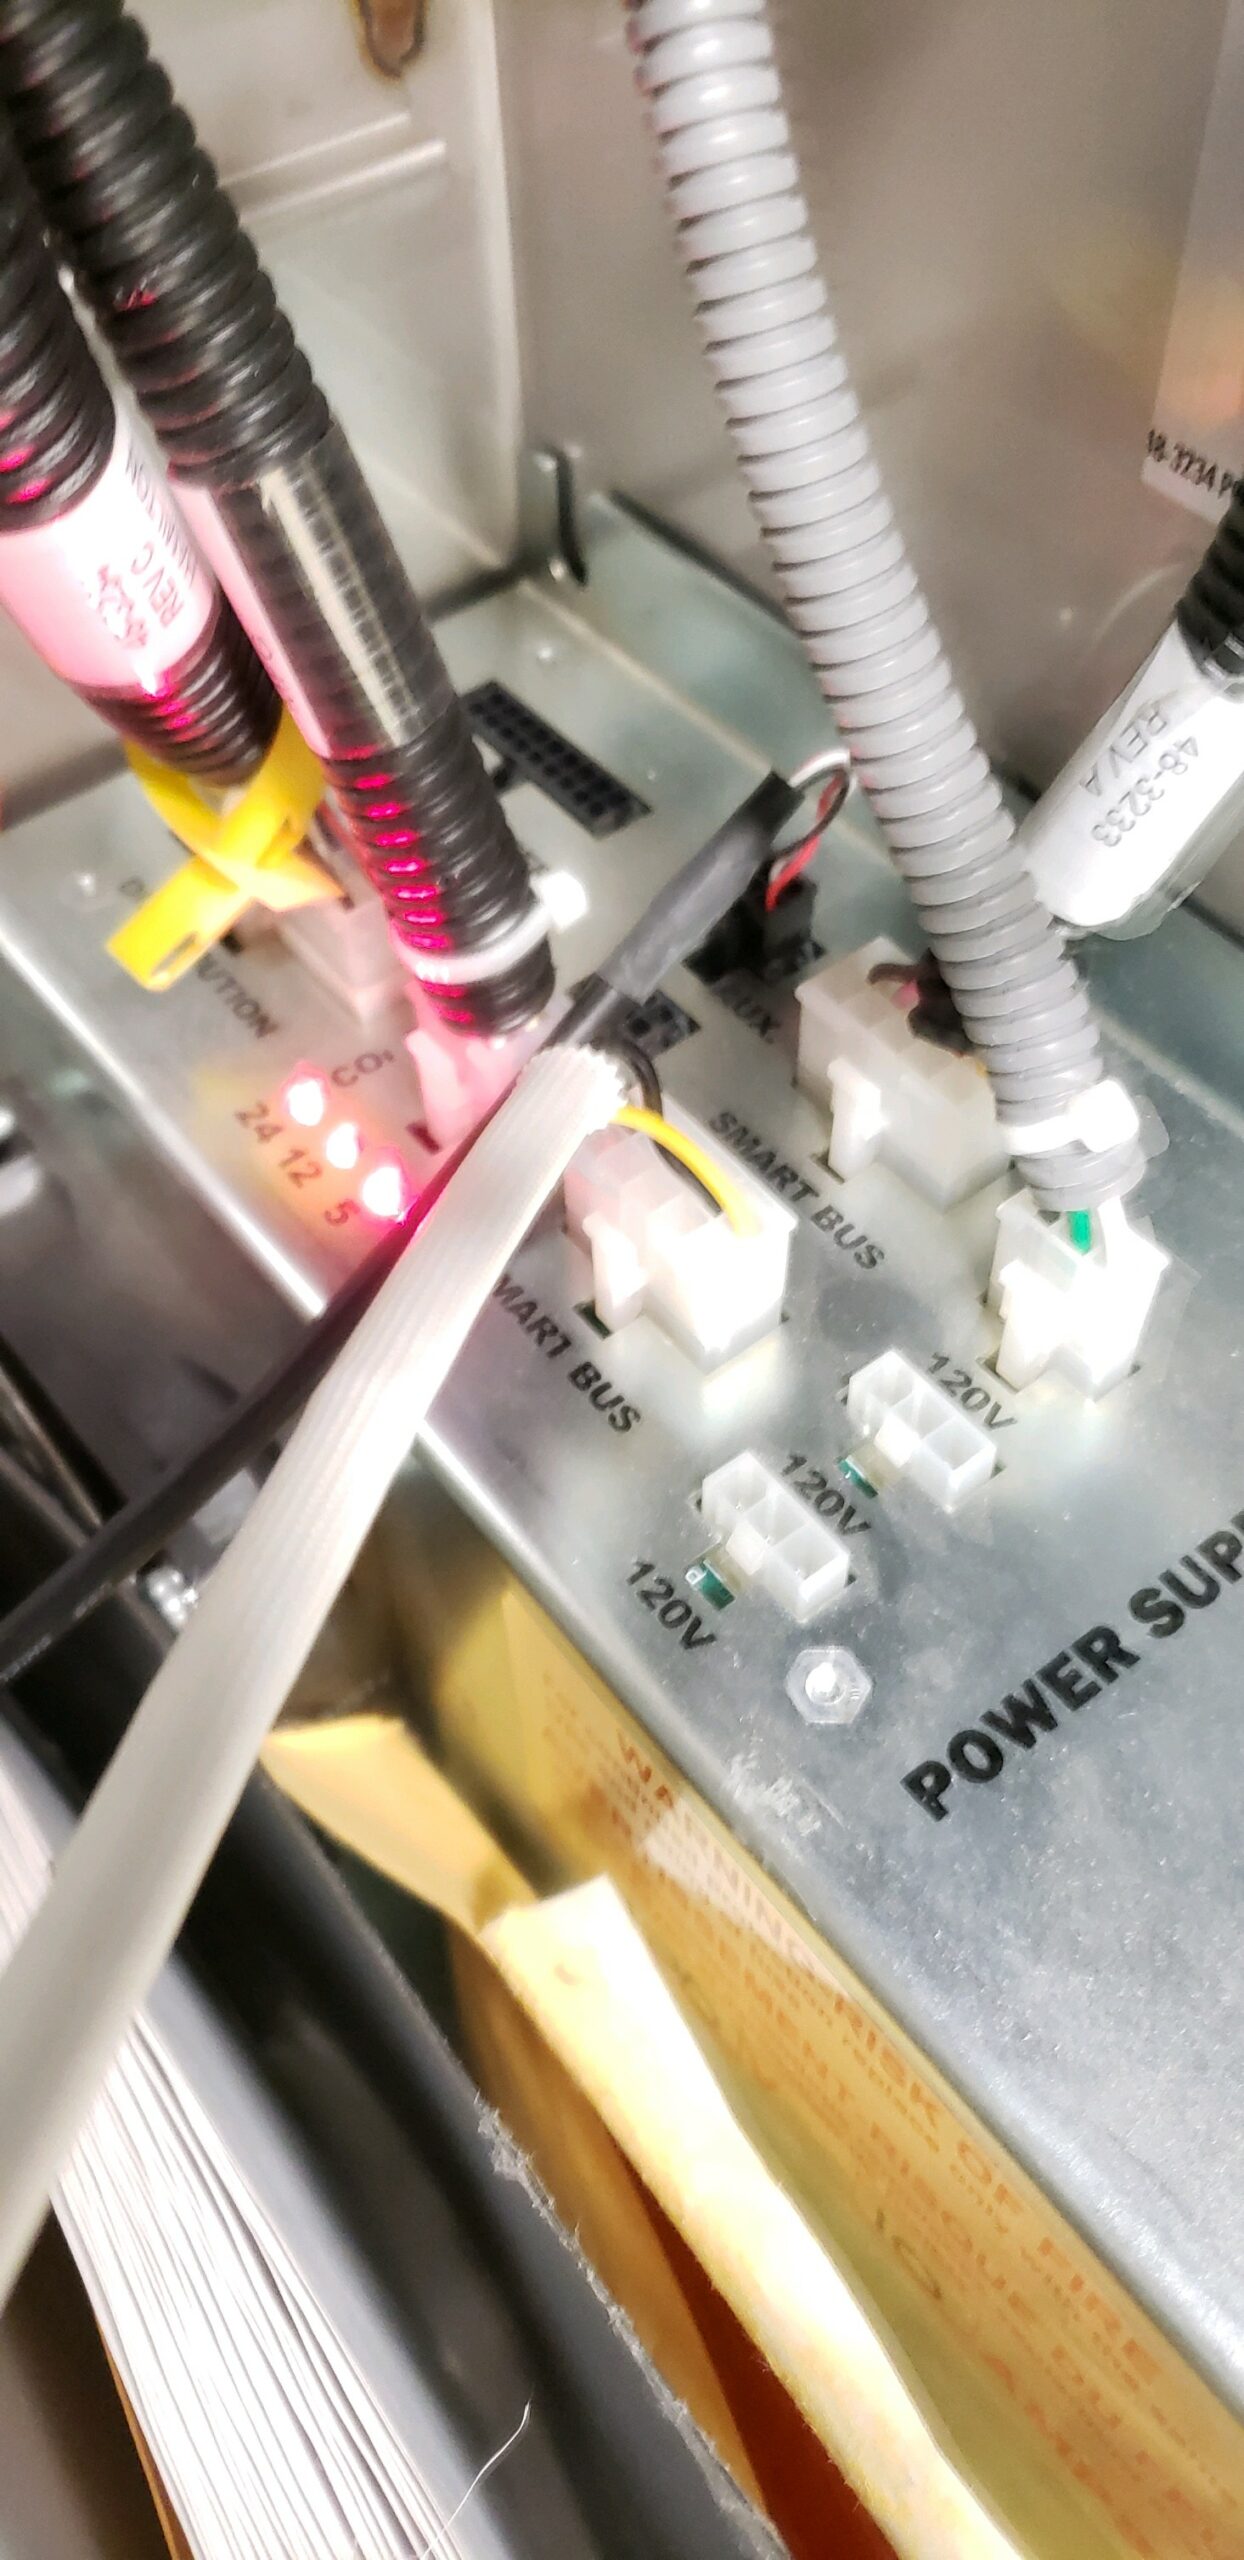
- Connect Power Harness to Switch, Datacap Device and plug into “Smart Harness” port on Power Supply
White Cable:
Brown to V1-
Yellow to V1+
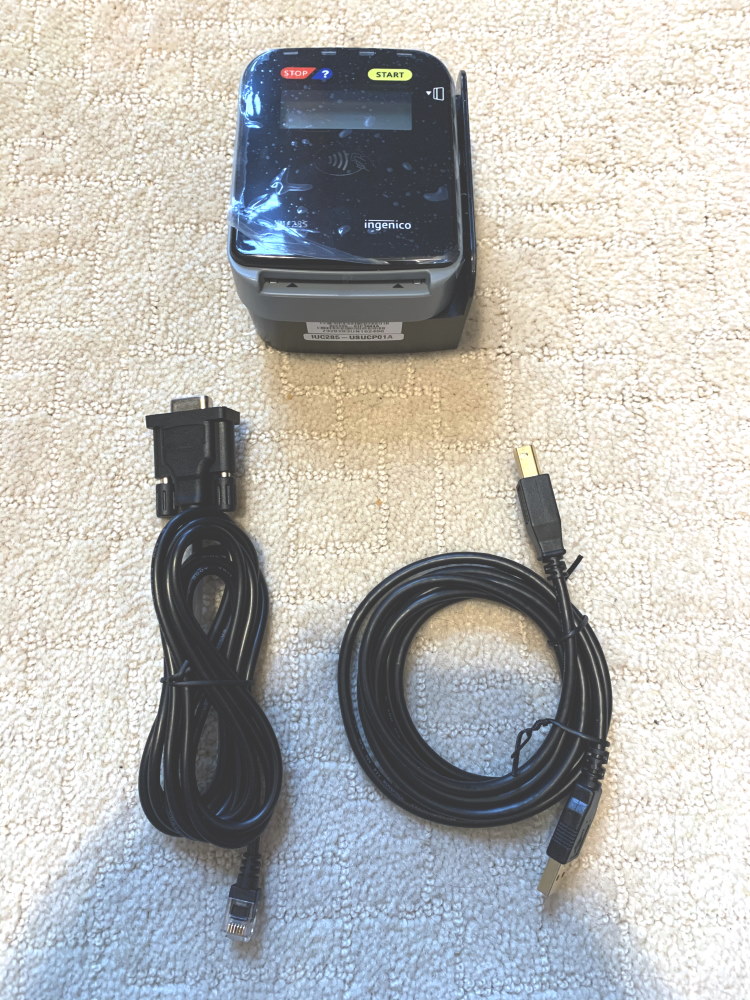
Black to Datacap - Swap EMV Reader
- Connect 6′ USB A/B cable from EMV to the controller for power
- Connect RJ12 -> DB9 cable to EMV reader RJ12 port (Datacap instructions)
- Connect DB9 -> Mini DIN cable to RJ12 -> DB9 cable, then to Datacap device
- Power on HTK/CTK – Switch & Datacap Device should show power
- Put HTK in Administrative Mode and Login
- Insert Hamilton Thumbdrive and go to “Check for Updates”, install update from drive
- After reboot, go back into HTK Administrative Mode
- Go to Configuration -> System -> Cards -> Card Settings (tab) -> Under “Card Module”
- Change “Card Module” to “netPark Pay”; Save; Activate Changes; Exit Administrative Mode

- In netPark -> Self Park, modify the HTK/CTK device (Gear Icon) and set the Cloud Terminal to the newly registered device (*netPark Support will complete this portion remotely)
- Test a transaction at the device. Void transaction in netPark.
- You’re done!
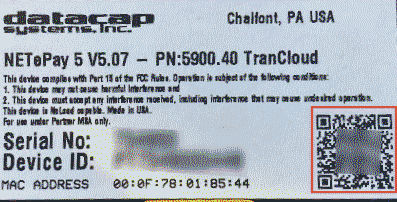
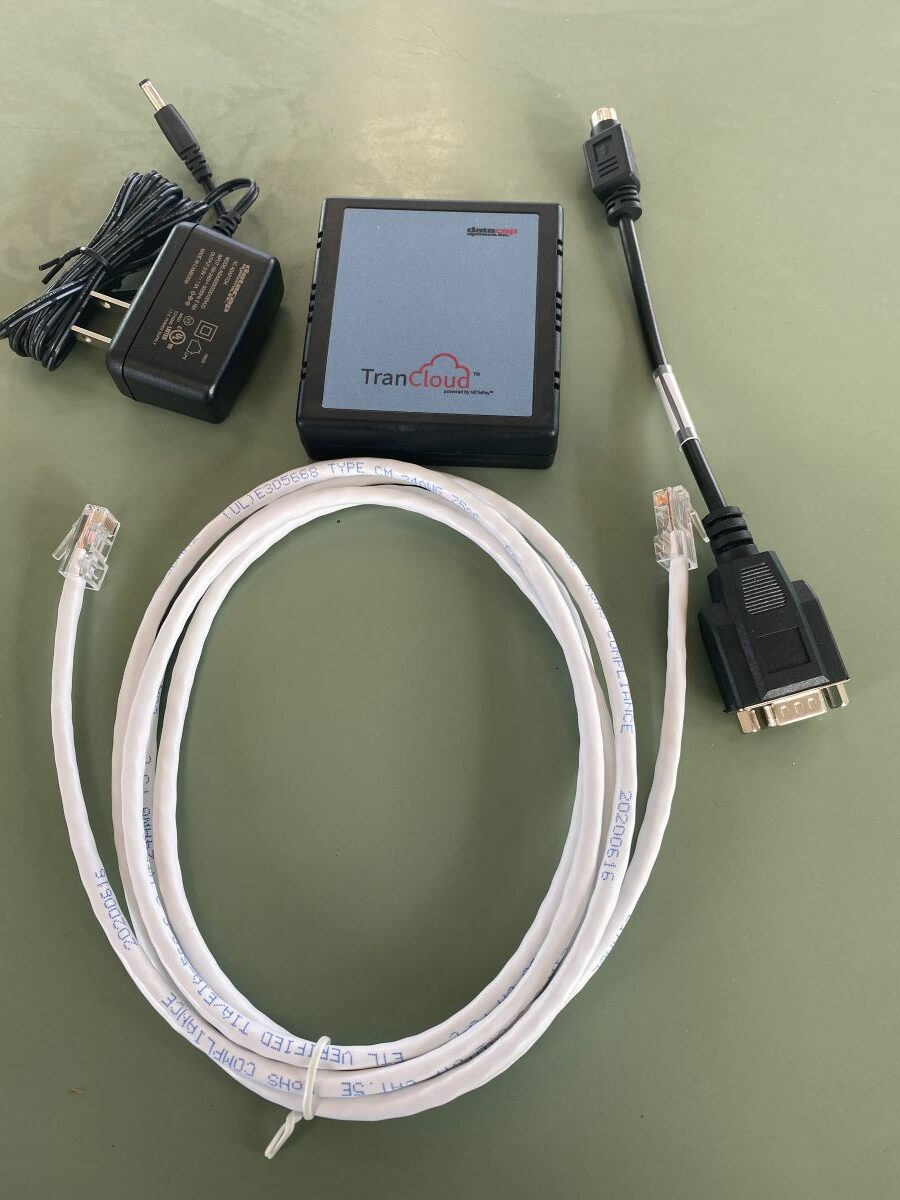
Datacap Status
The Datacap server manages the communication between the EMV reader and the backend server. On the back of the Datacap device is a QR code. When this code is scanned it directs to a website that shows the status of the device. This can be useful for troubleshooting issues with connectivity or functionality.Note on Voiding & Crediting
The netPark Pay Processing has a 1 day limitation for refunding payments taking via the Kiosk. Payments can only be refunded up until the batch is settled for the day. Once the batch has been settled you will need to get the credit card details from the customer again and process a refund via the Register Transactions screen.