netPark Pay Reconciliation
The guide walks through the typical Funding Reconciliation process between netPark and netPark Pay.
The guide walks through the typical Funding Reconciliation process between netPark and netPark Pay.
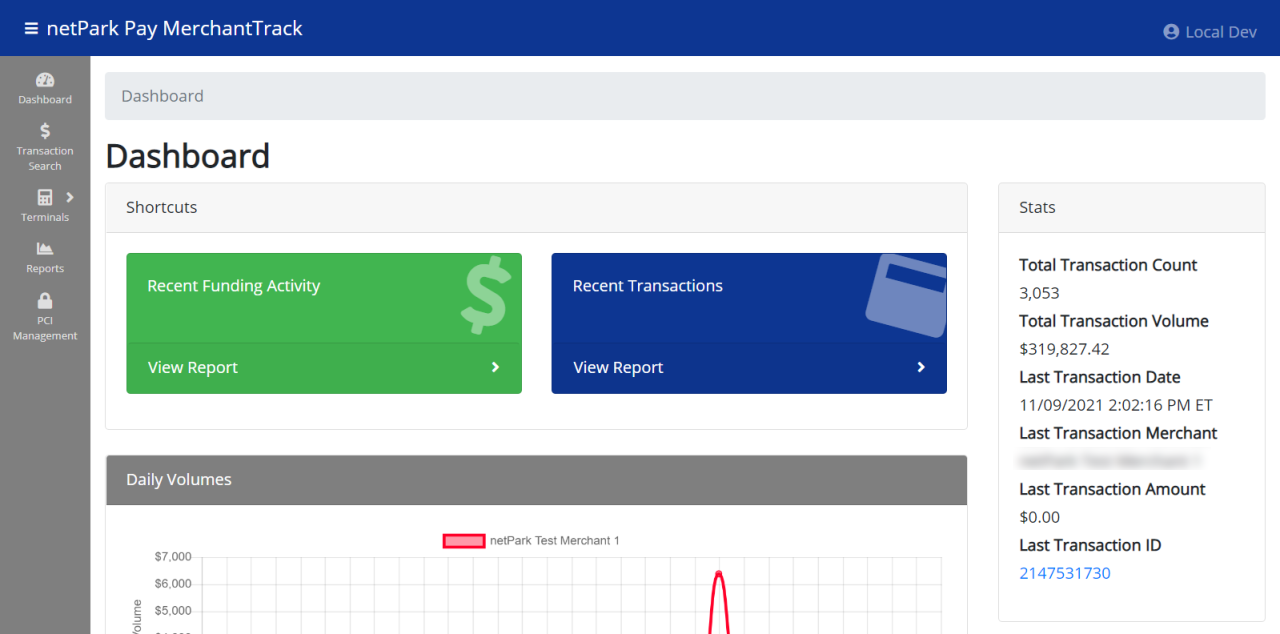
Learn about the Merchant Portal that is available with netPark Pay.
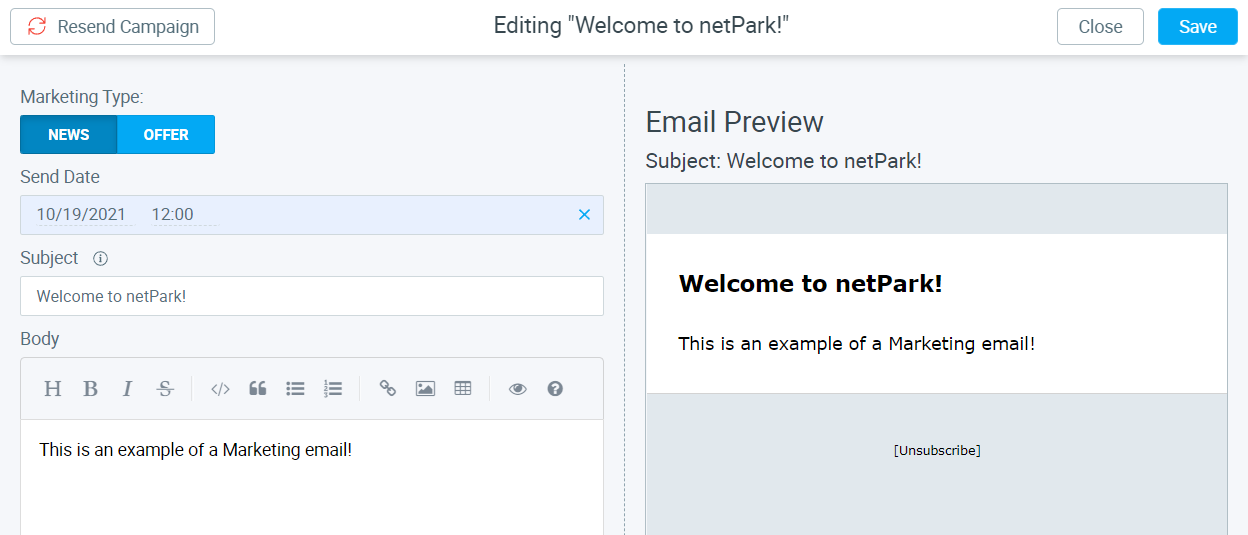
Learn about how to send Mass Marketing & Communications emails.
This article details out some of the more frequently asked questions for netPark Pay and their common answers.
This article will explain the dynamic rate process, how to use it, and the options it offers to your rates A dynamic rate is a rate that can change when set variables created by you. This can be blacking out date ranges, changes the rate amount during an extended period of time, and can also be used to set the number of reservations each rate can be booked in the system. How to create a dynamic rate: 1. Click Maintenance 2. Click Reservation Rates 3. Choose the rate you want to edit in the drop down 4. Click the edit rate pencil 5. Then select the edit advanced options and dynamic rate pencil 6.Click Add Dynamic Rate 7. Fill out
This article will show you how to black out dates on reservations and how it works The black out option makes it so that no one can make reservations with that rate during the selected time frame. How to black out dates in a reservation: 1. Click Maintenance 2. Click Reservation Rates 3. Select the correct rate source in the drop down 4. Click the edit Pencil symbol 5. Make sure the dates are the dates you want to black out 6. Check the Black out dates box 7. Click the Save Revision button
This article is a summary of the configuration screen of the desktop application How to access the configuration screen: 1. Click the 3 horizontal bars in the top right (aka hamburger menu) 2. Click configuration Note: if you already set a pin type it in, otherwise it will take you to the General Settings page General Settings This is for basic settings, you can set the zoom level, auto print, kiosk mode, and downloads location. Click here for more information. Location Settings This is for setting the default home screen, settings the entry and exit lanes, key tracking maintenance, and texting & locate log monitoring. Click here for more information Device Settings This is for configuring devices that connect to the application. Fee displays, Signature capture pads. Click here for more information. About This will tell you what version of the application you are running, when it was released, and
This article explains the device settings 1. Click the 3 horizontal bars in the top right of the application (Hamburger Menu) 2. Click Configuration 3. Click Devices Default Text Default Text: This is what shows at all times between transactions. Usually a welcome banner or company message. 1. Click the Pencil on the right to edit these fields 2. Add your desired text (20 characters max.) Note: Below is what it looks like when the field is editable 3. Click the Save button in the top right after editing Thank You Text Thank You Text: This is custom text that shows briefly after a payment is taken 1. Click the Pencil on the right to edit these fields 2. Add your desired text (20 characters max.) Note: Below is what it looks like when the field is editable 3. Click the Save button in the top right
This article explains the general settings area and the options How to get to the General Settings: 1. Click the 3 horizontal bars in the top right of the application (Hamburger Menu) 2. Click Configuration 3. You are now on the General Settings page Configuration Pin Here you can set a pin to lock down access to the application configuration screen. Enable Kiosk Mode Puts the desktop application into kiosk mode Hide tab bar in Kiosk Mode Hides the tab bar while in kiosk mode. Disable Auto Print Stops the application from automatically printing anything. You must manually select the print options. Zoom This allows you to change the size of the text on the screen . Downloads Location Tells netPark where to save files and reports it downloads.
This article will show you how to edit location settings in the netPark desktop application How to get to location settings: 1. Click the 3 horizontal bars in the top right of the application (Hamburger Menu) 2. Click Configuration 3. Select Location on the left then choose your location from the middle of the screen 4. The settings are on the right Default Screen You can set the default screen that loads when you login to the desktop application Device Integration Device Entry Lane: Enter your entry lane number for logging and control purposes. It will open the lane when a ticket is opened in the open ticket or quick open ticket process. Device Exit Lane: Enter your exit lane number logging and control purposes When this is set, the lane will open when a ticket is closed via the close ticket screen. Key